EP1000
Tetrabytes
For our project, we are to build a product using Dfab skills we learnt. I wanted to build something practical and purposeful so I decided to build an automatic fish feeder, Tetrabytes, that will feed every 12 hours. The aim is to make it simple and efficient. Here is the plan:
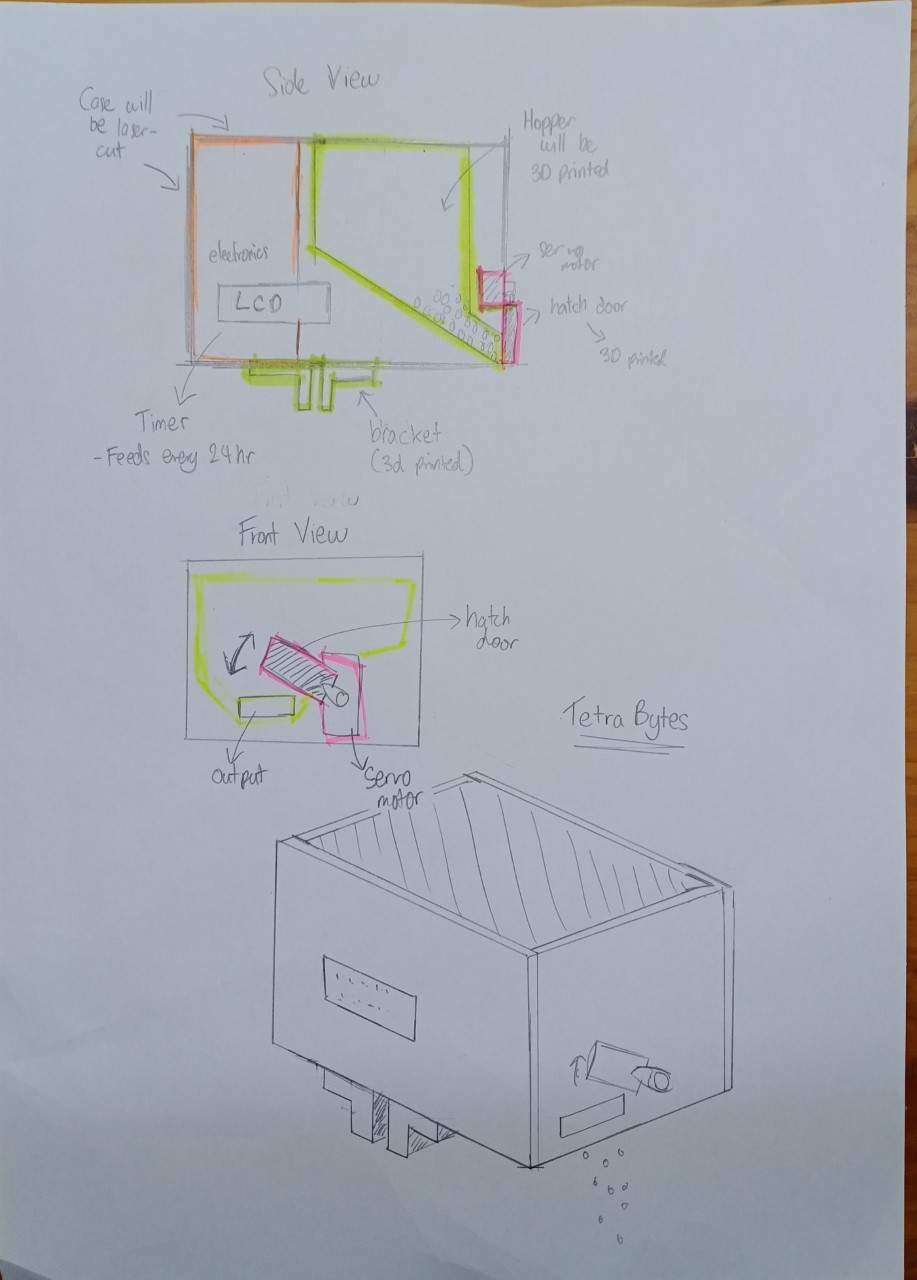
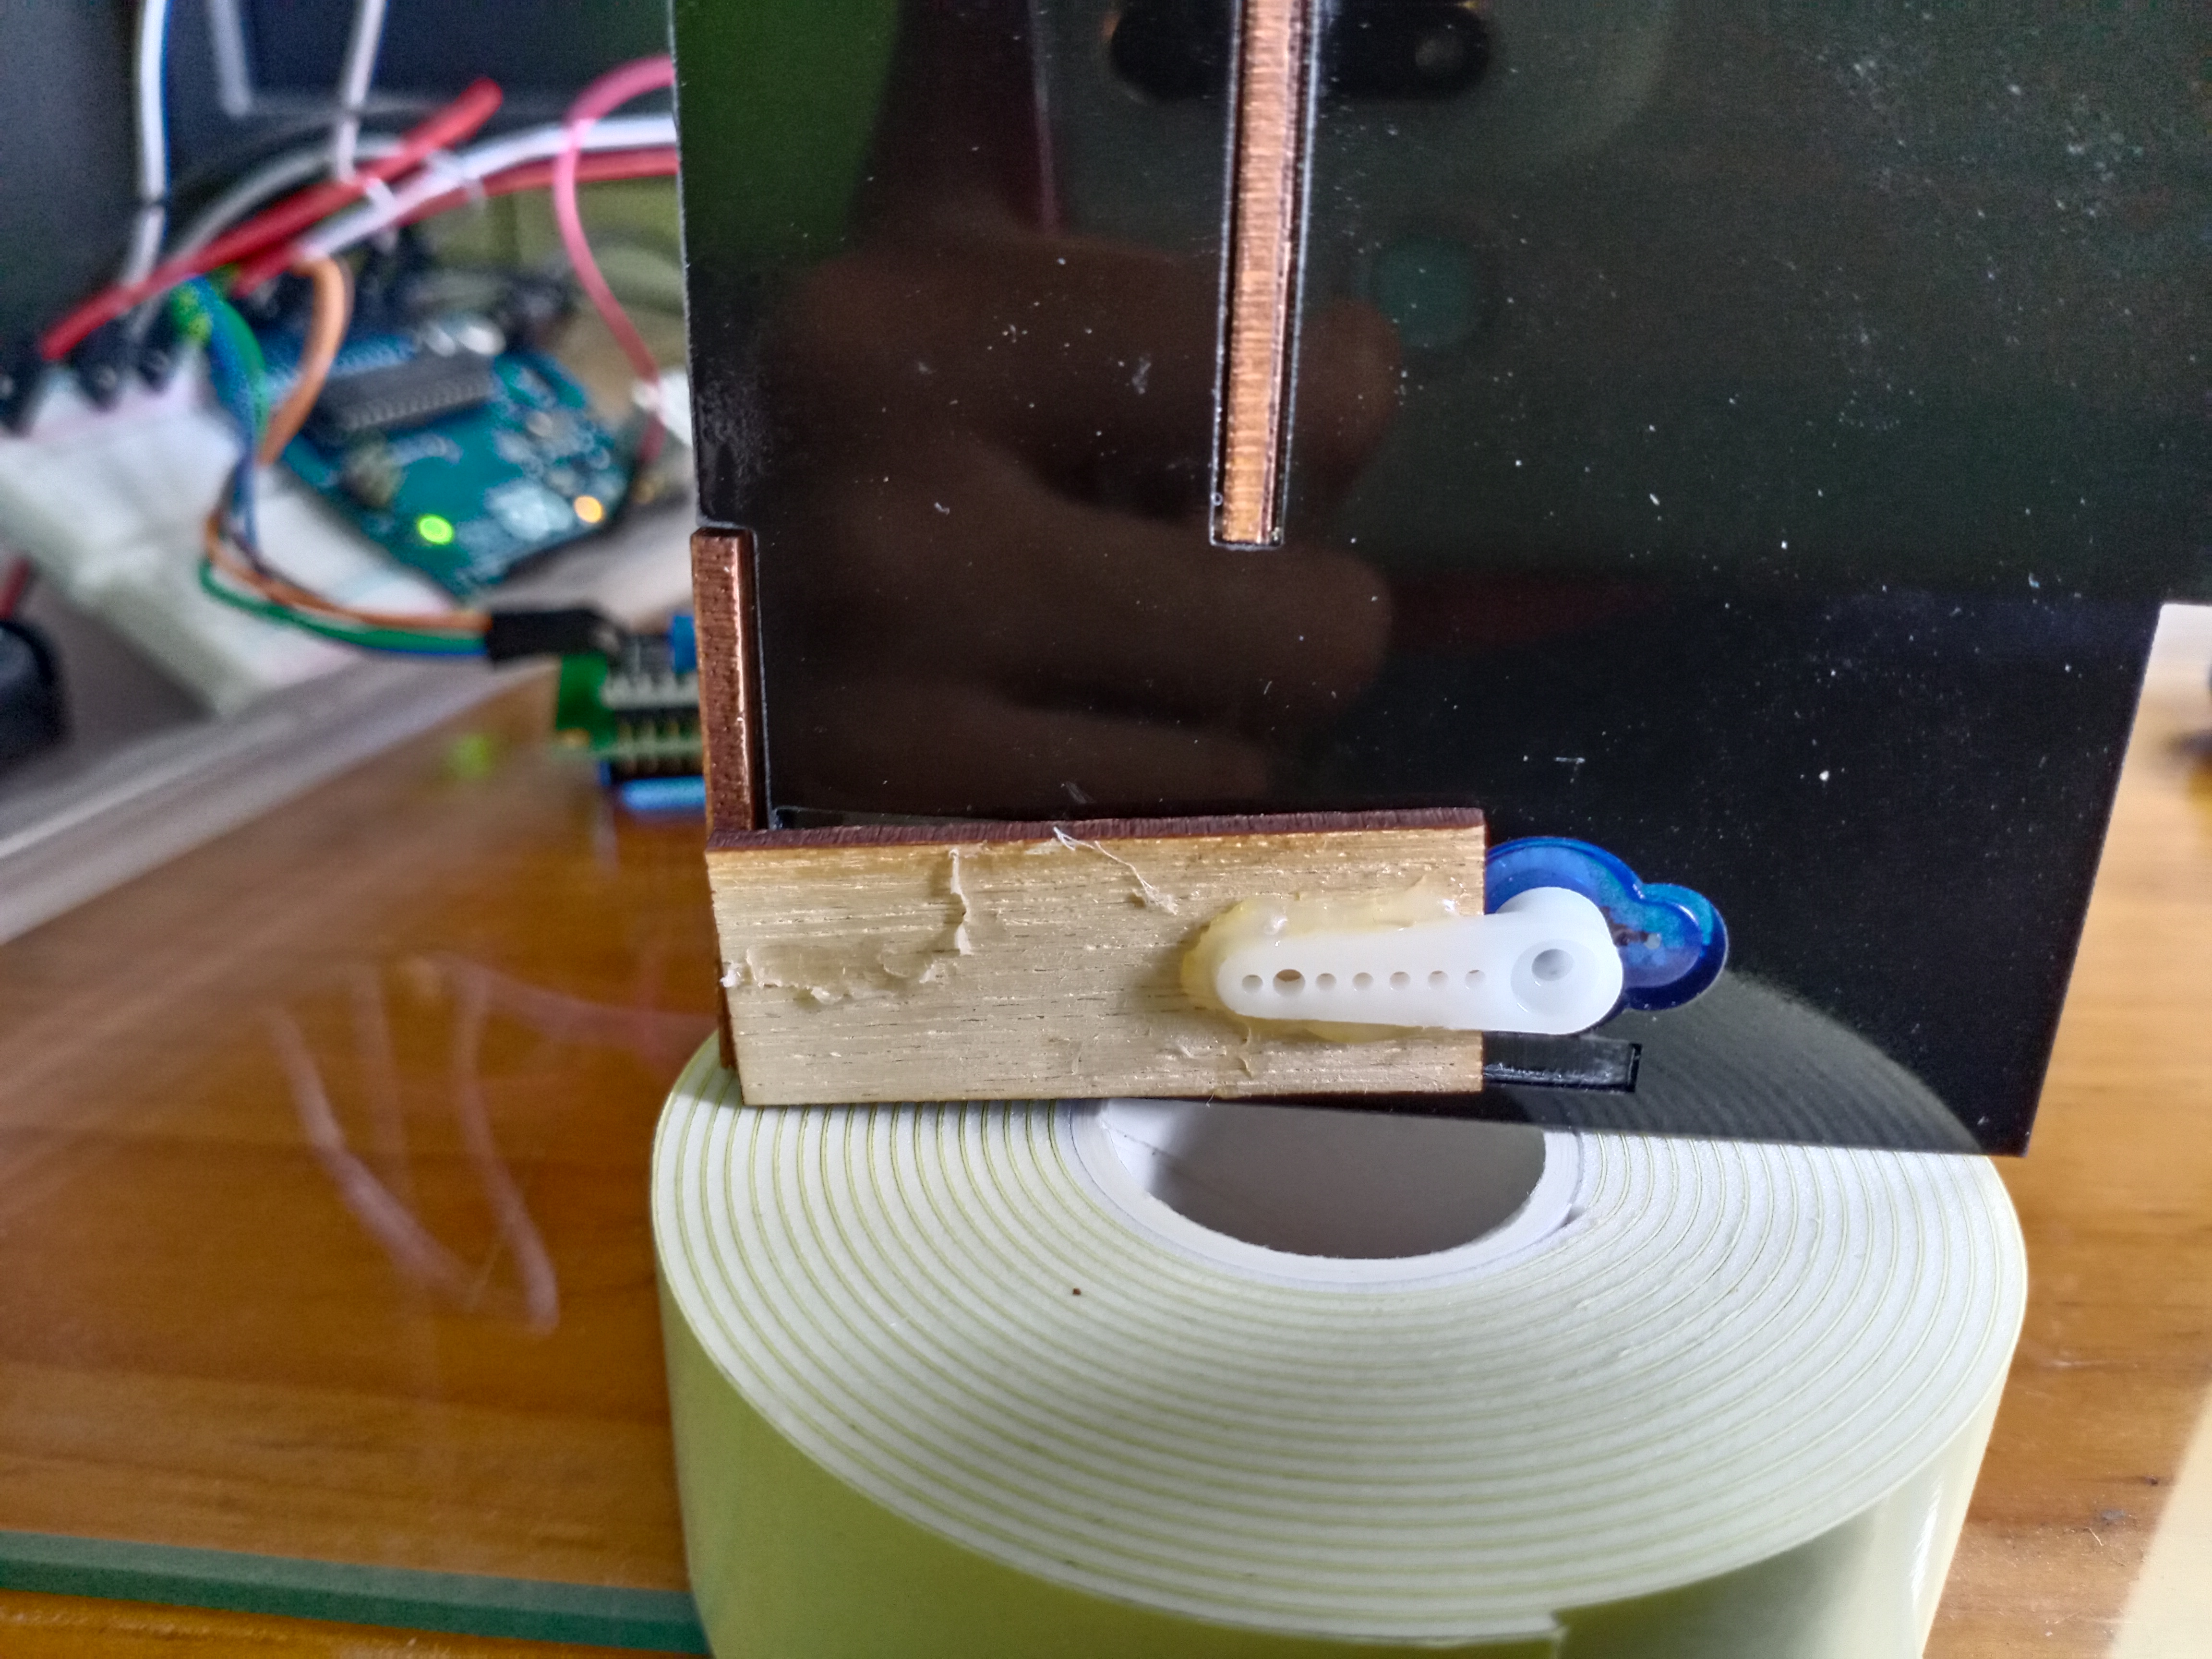
I went with the sliding door system as it is simple and easy to delivery the food. It only requires a servo motor to operate. The main case and “sliding door” will be laser cut while the hopper system and bracket will be 3D printed. TetraBytes will be programmed to feed the fish every 12 hours, this will be displayed on the LCD.
Main components I need:
- Arduino Uno
- Small Breadboard
- Servo FS90 9g
- LCD 1602 2x20 with I2C
- Battery holder
Coding and electronics
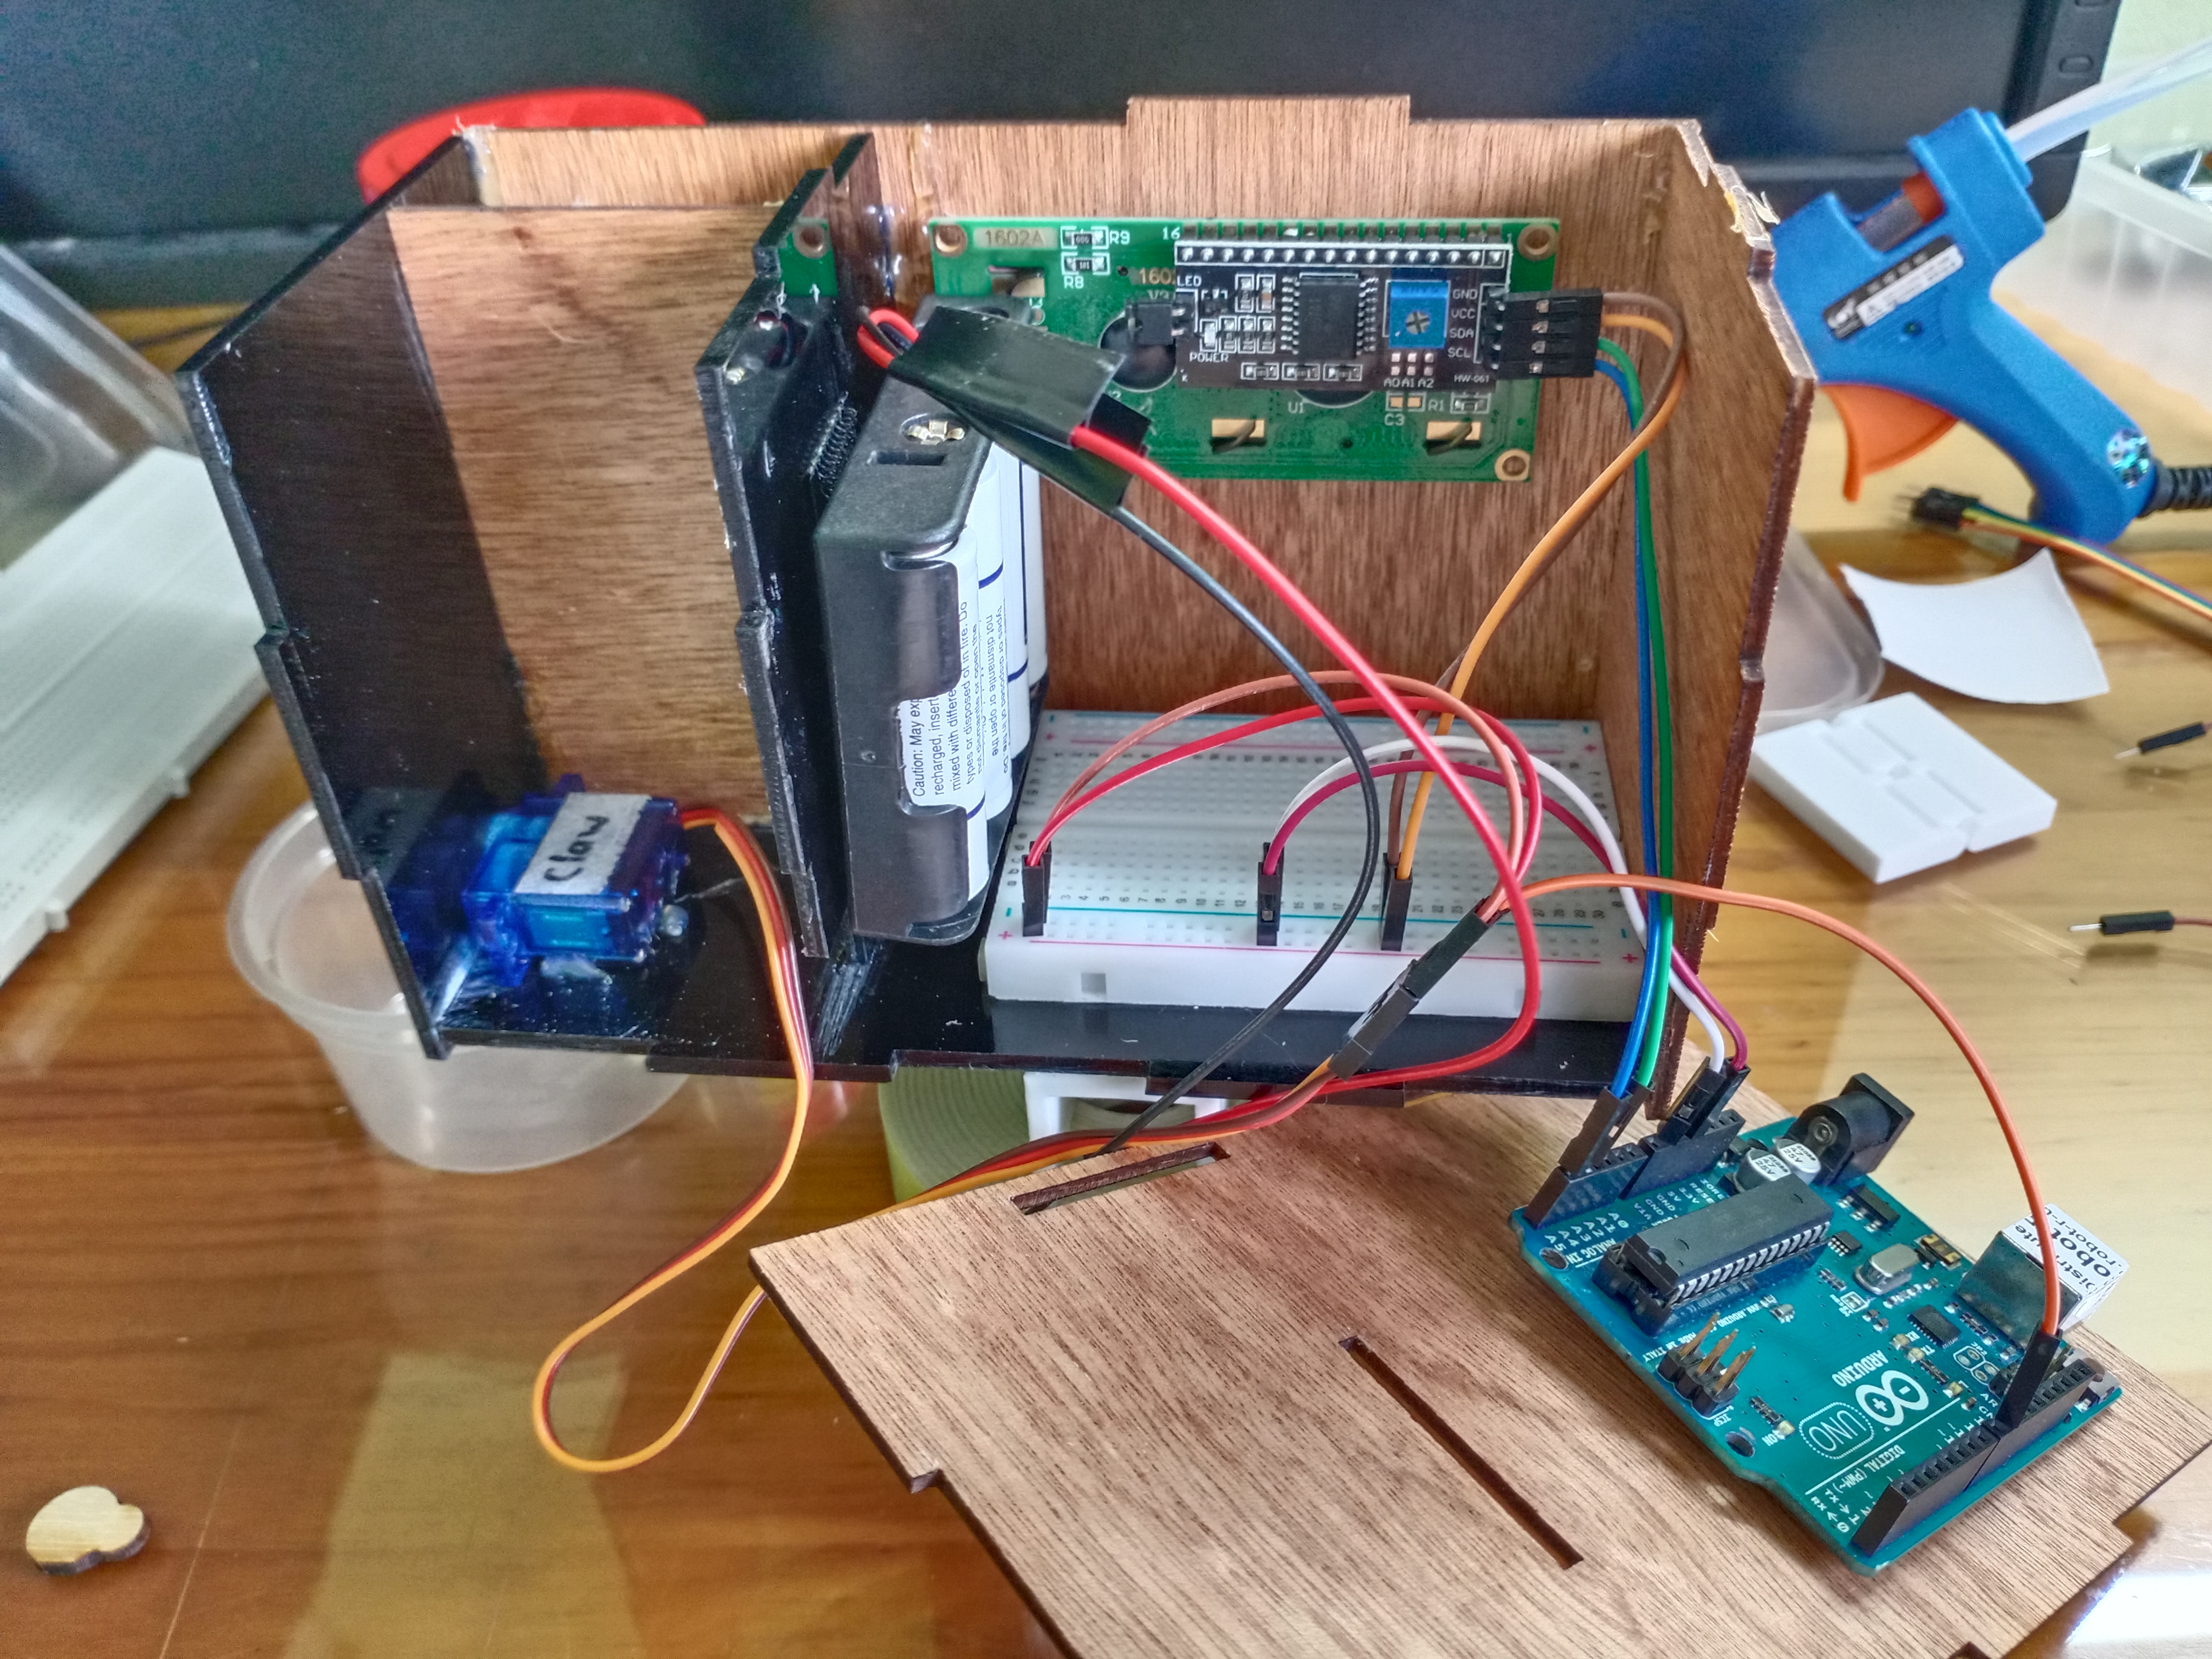
The electronics part is quite easy because there is only output devices connected. The LCD will just display the feeding time. I had to learn how to control the movement of the servo motor and how to use a timer. I will be using milli(s) function as the timer. Once the arduino powers up, the milli(s) will start counting. To activate the servo motor, I will use the if function and then once the servo has been activated the timer will reset. This will run in a loop.
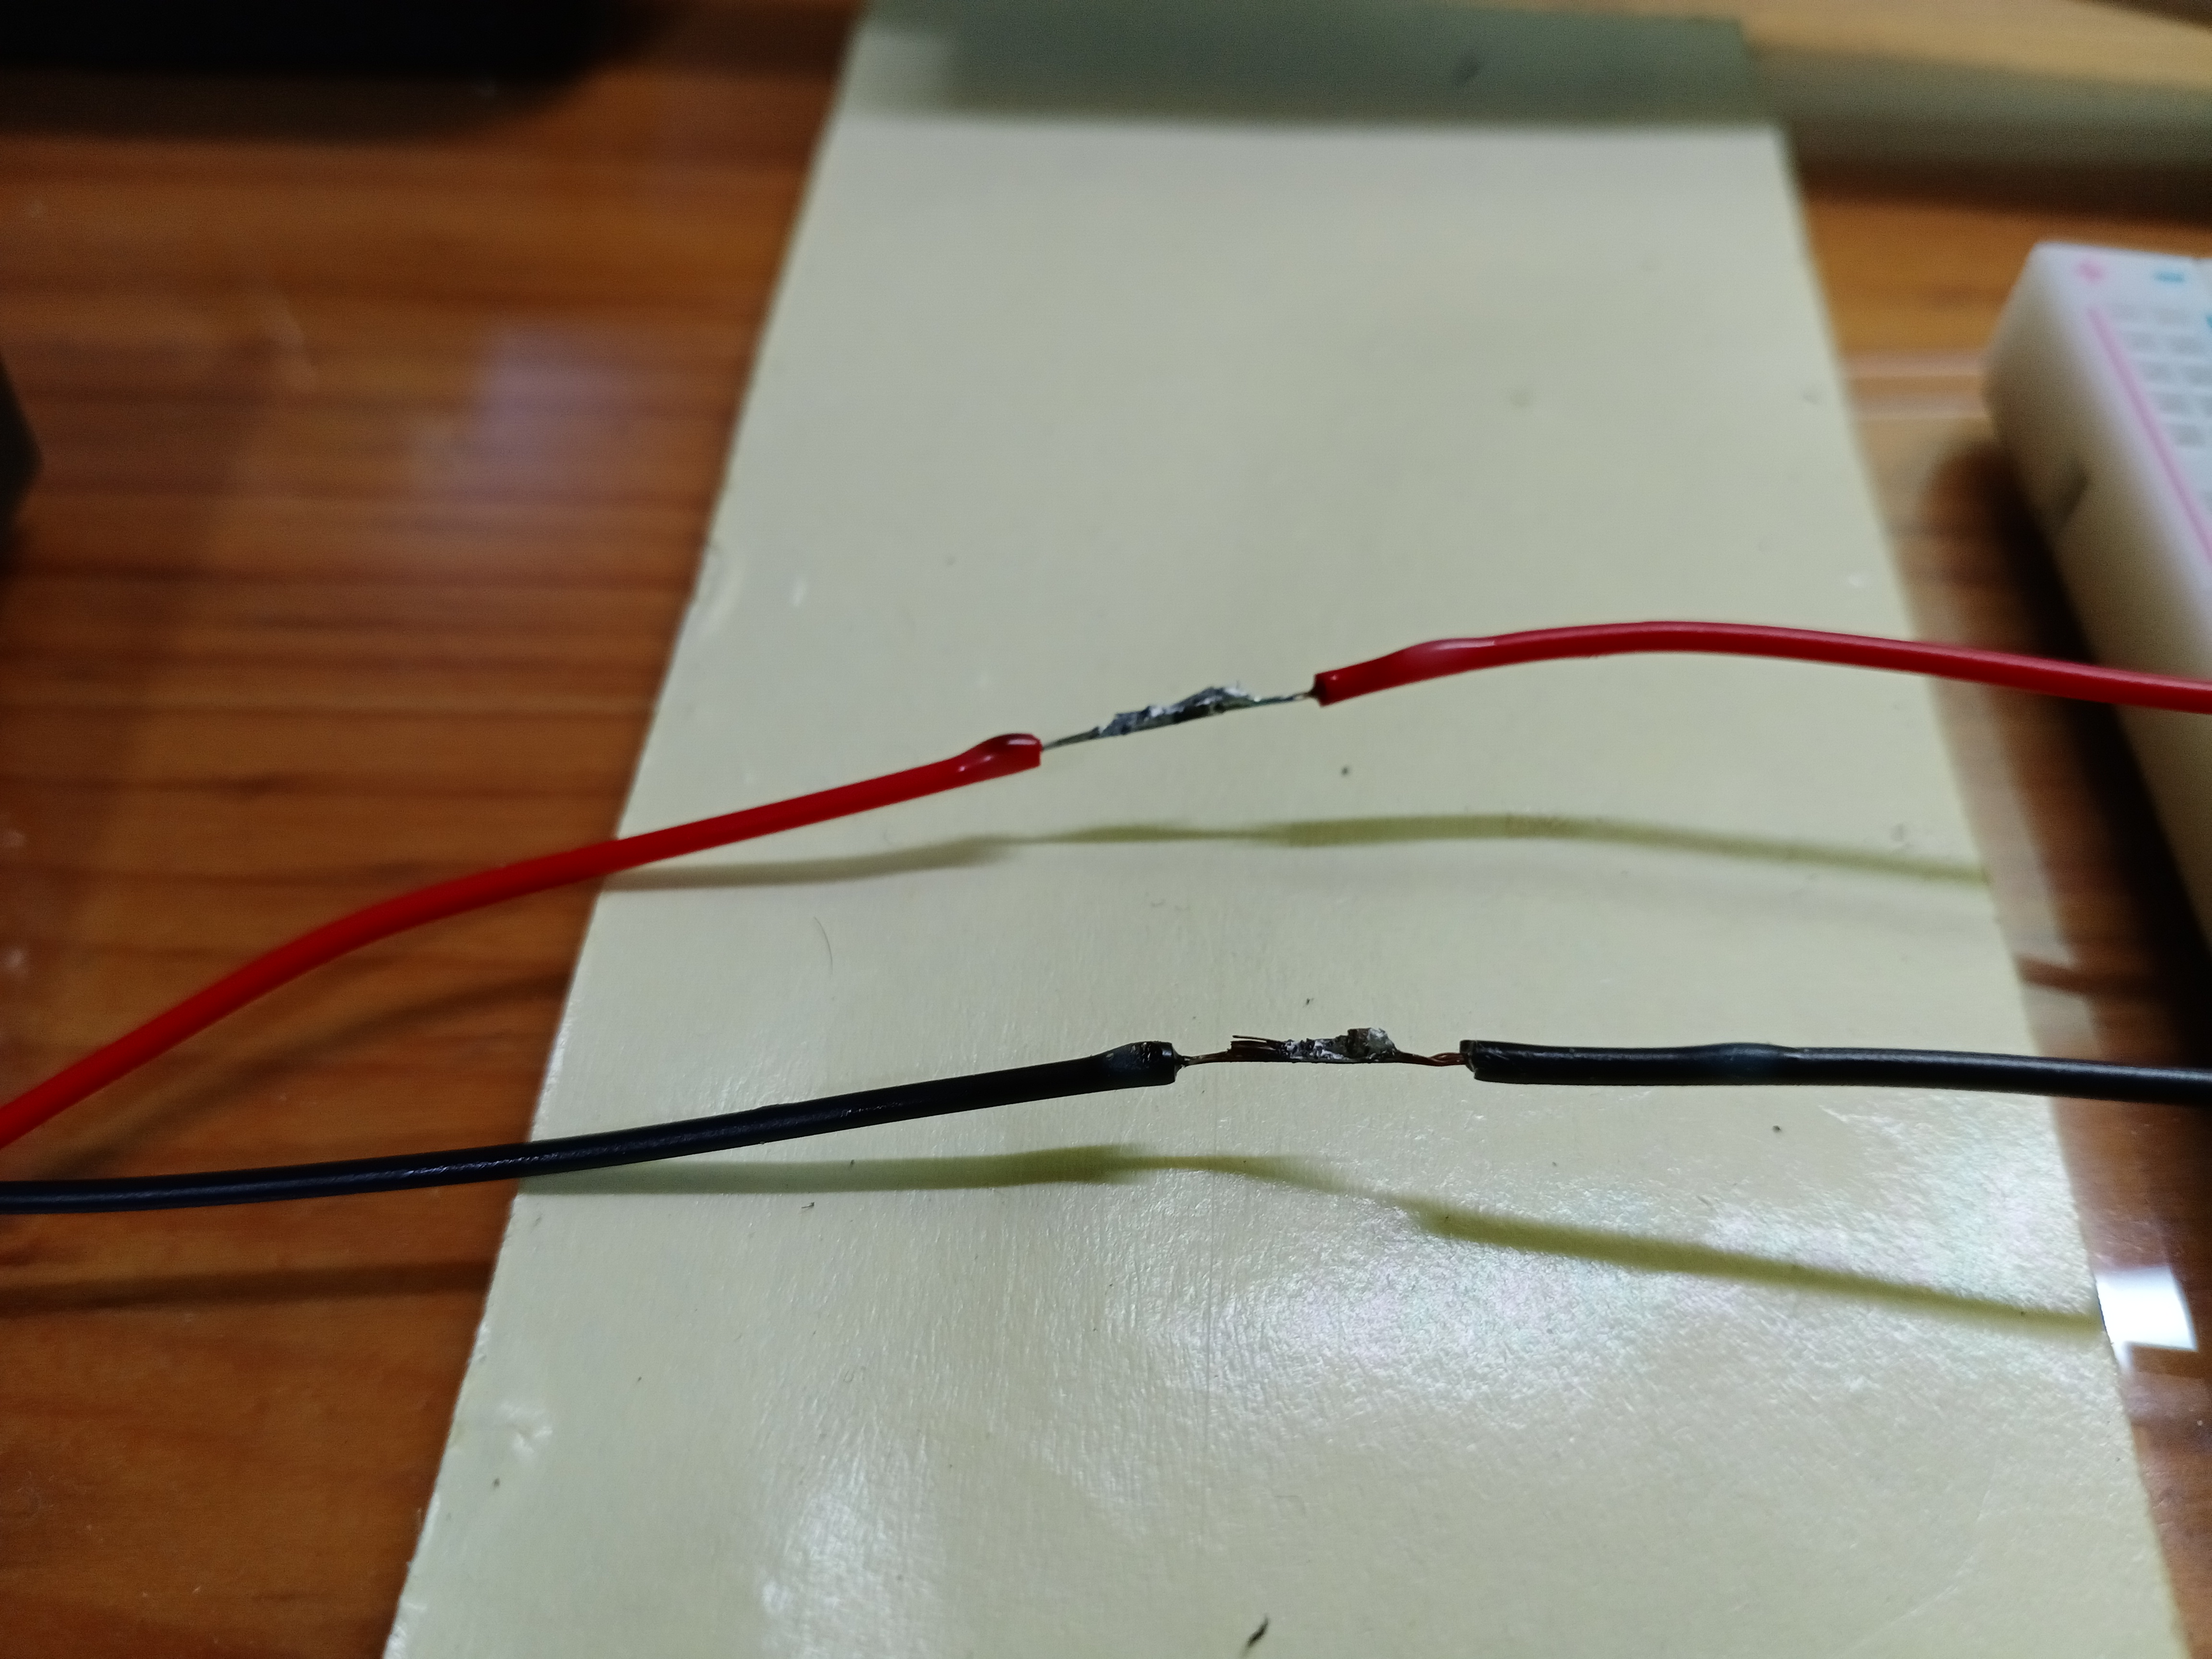
To power it up I need to connect the battery holder to breadboard. I need to solder the wires from battery holder to Dupont cable so that I can connect it to the breadboard. I borrowed my father’s soldering iron and watched a tutorial on soldering. It is actually quite easy, there are 4 main steps to take. Connect the wires, add grease, heat the grease up and solder them. Here is the result:
Next, I need to do coding. First I add the servo code. I referred to the example code on arduino and some online tutorials. Then I add the milli(s) and if function. Next I add the LCD code. The code was quite manageable, it took a few tries to set the servo position and the timings. Here is the end results:

##Design
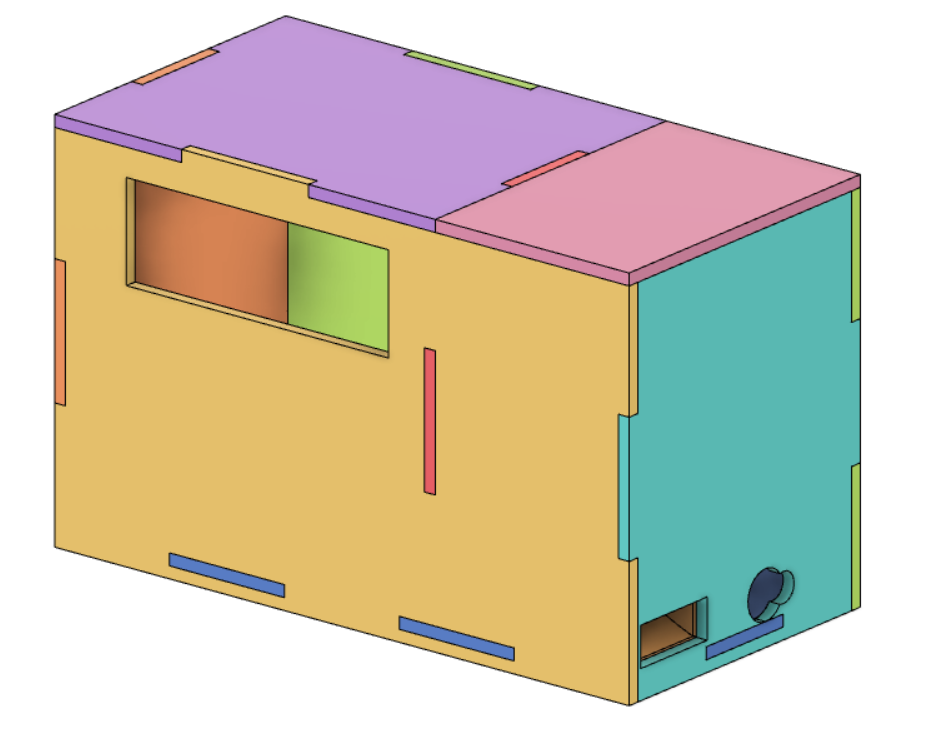
I want it to be compact and light. It needs to hold the fish food and electronics, therefore the case needs a divider.
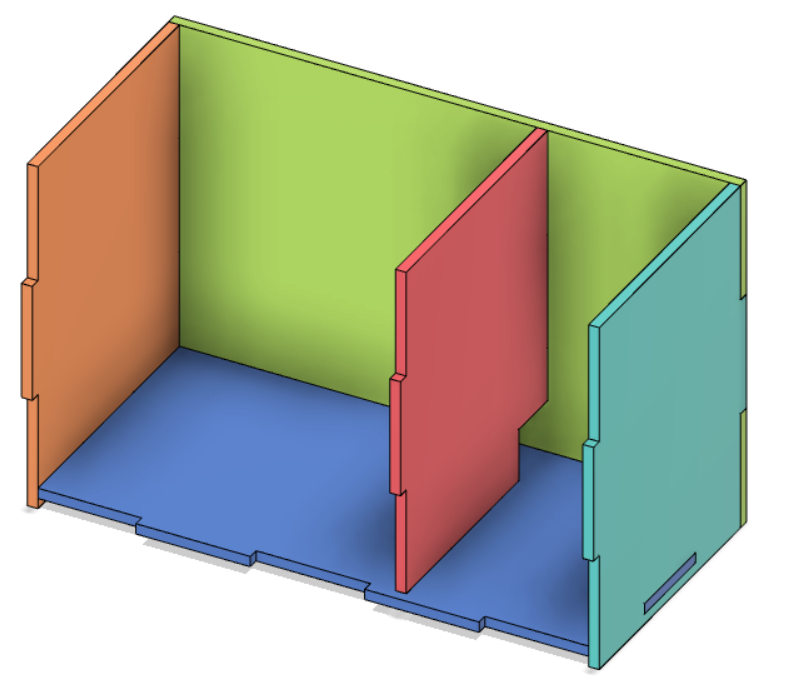
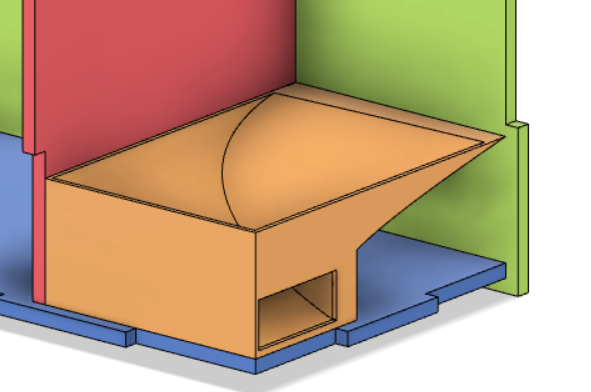
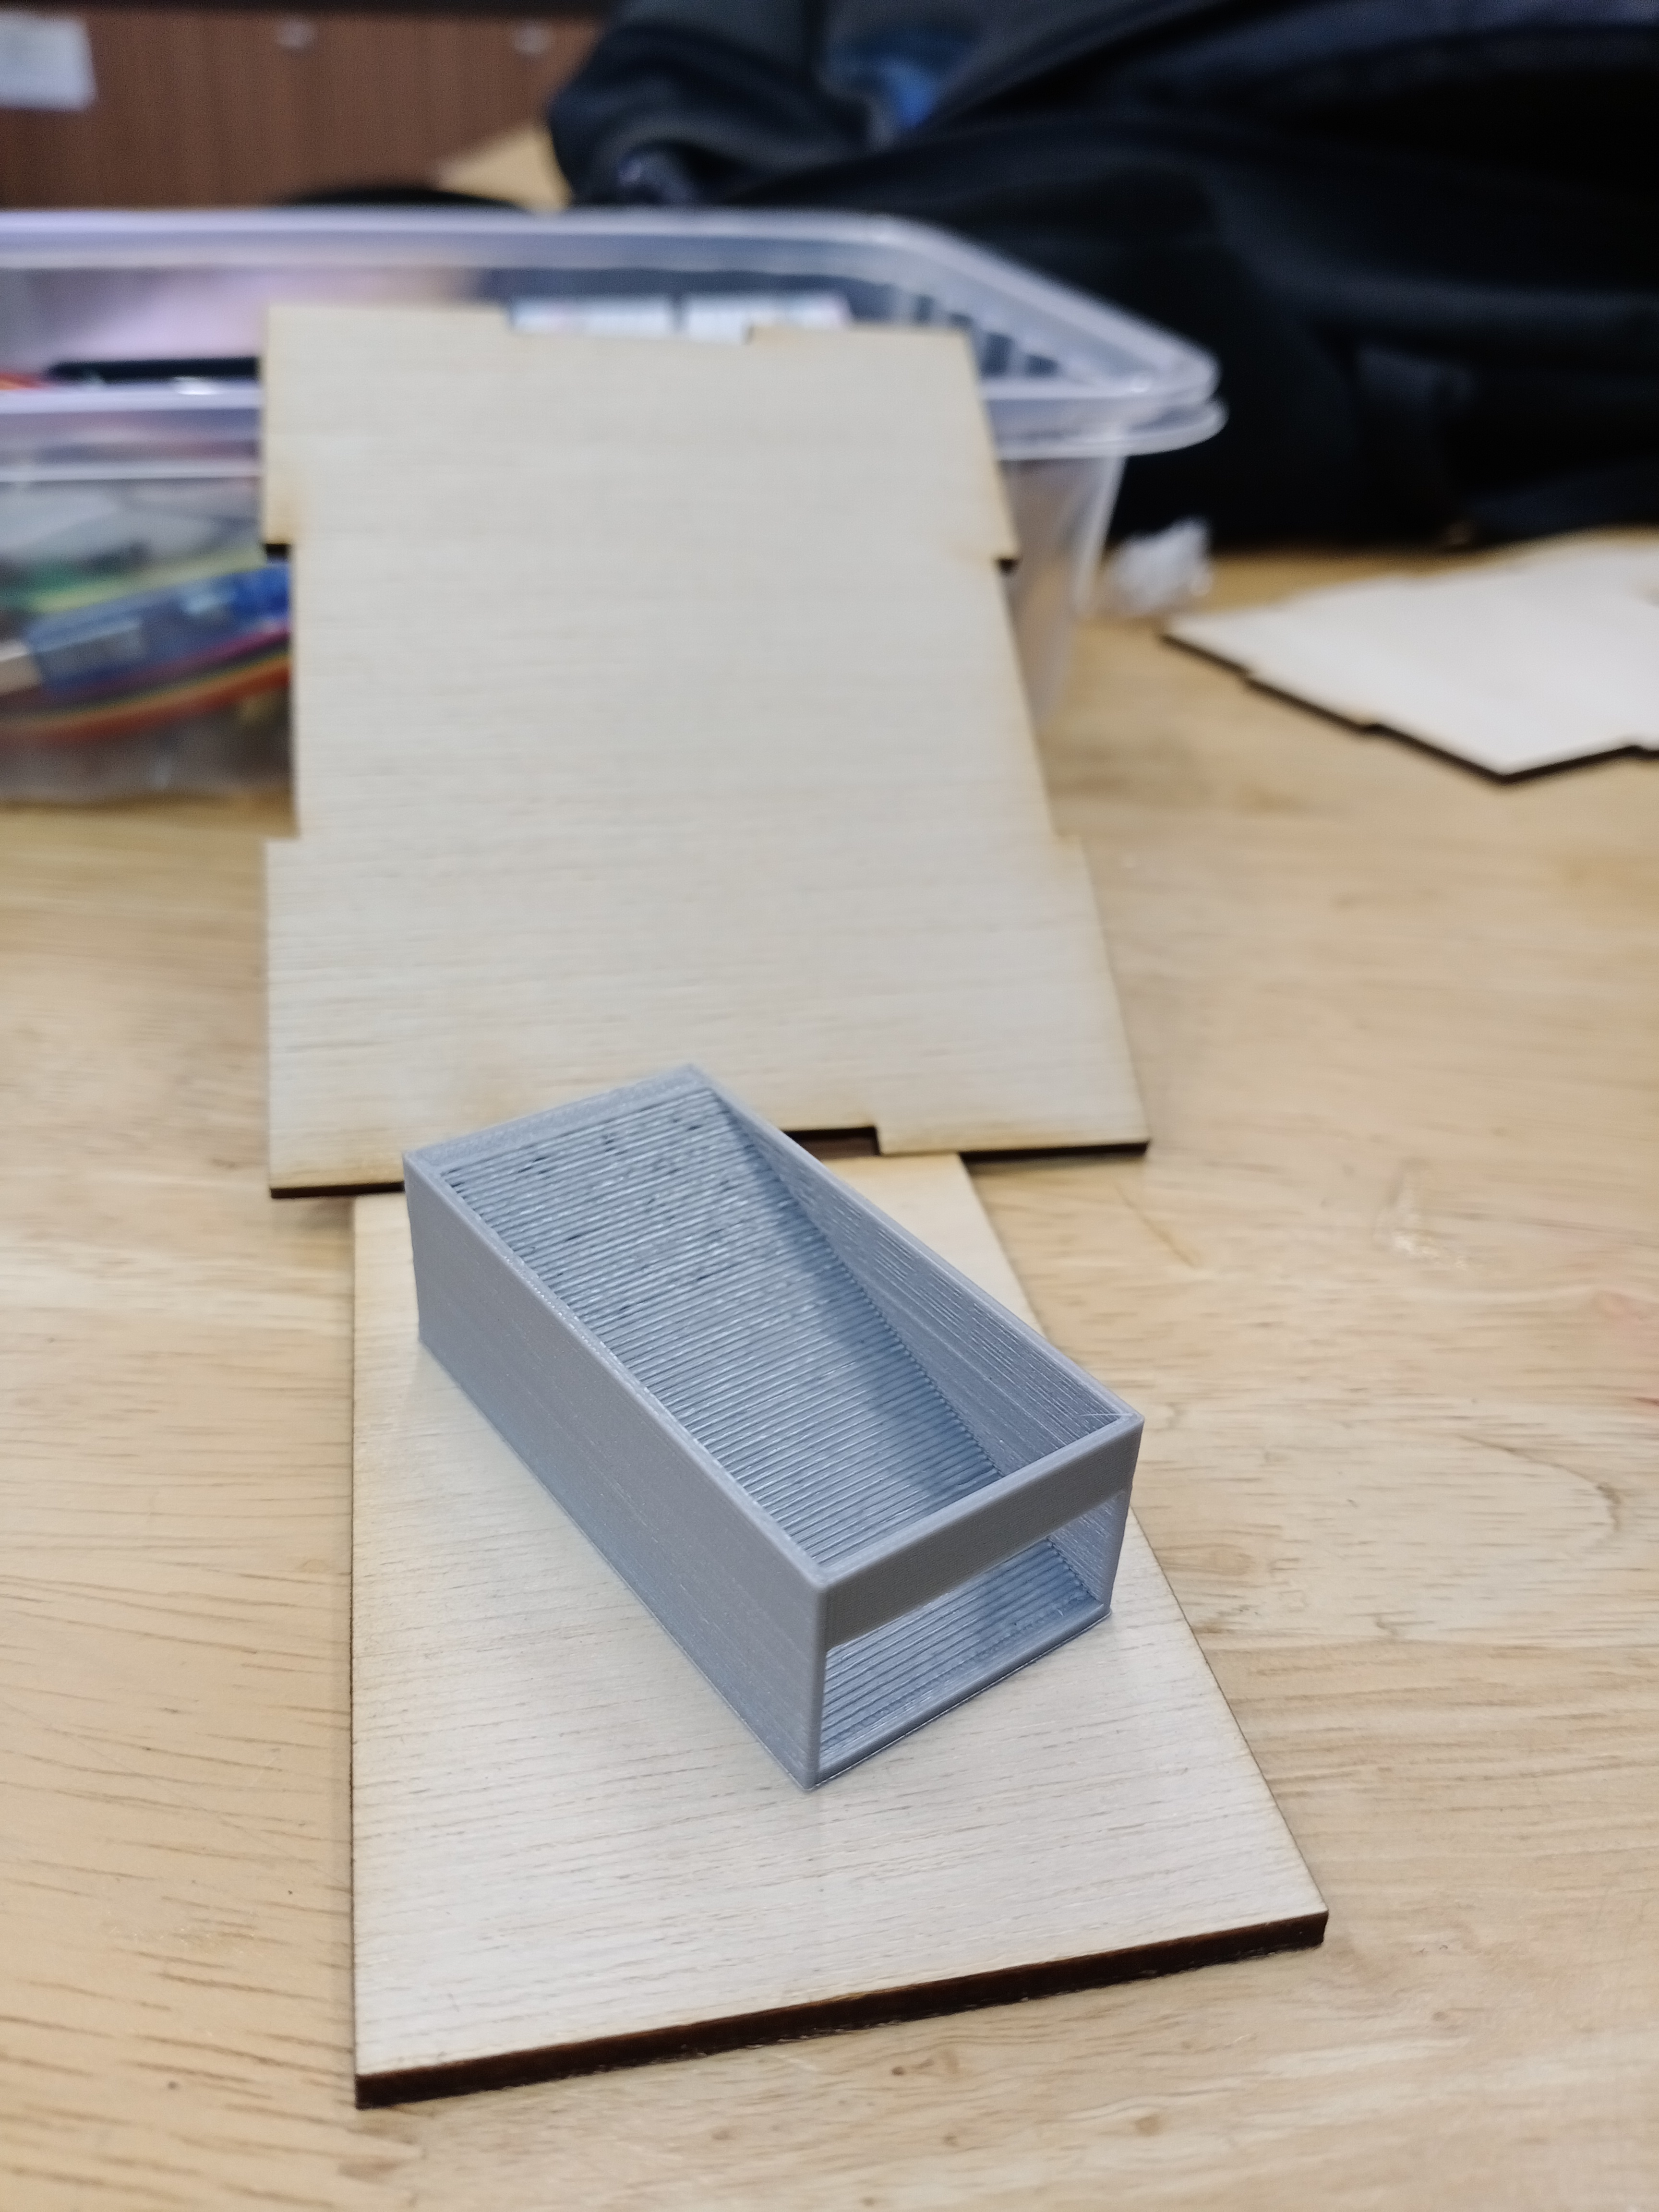
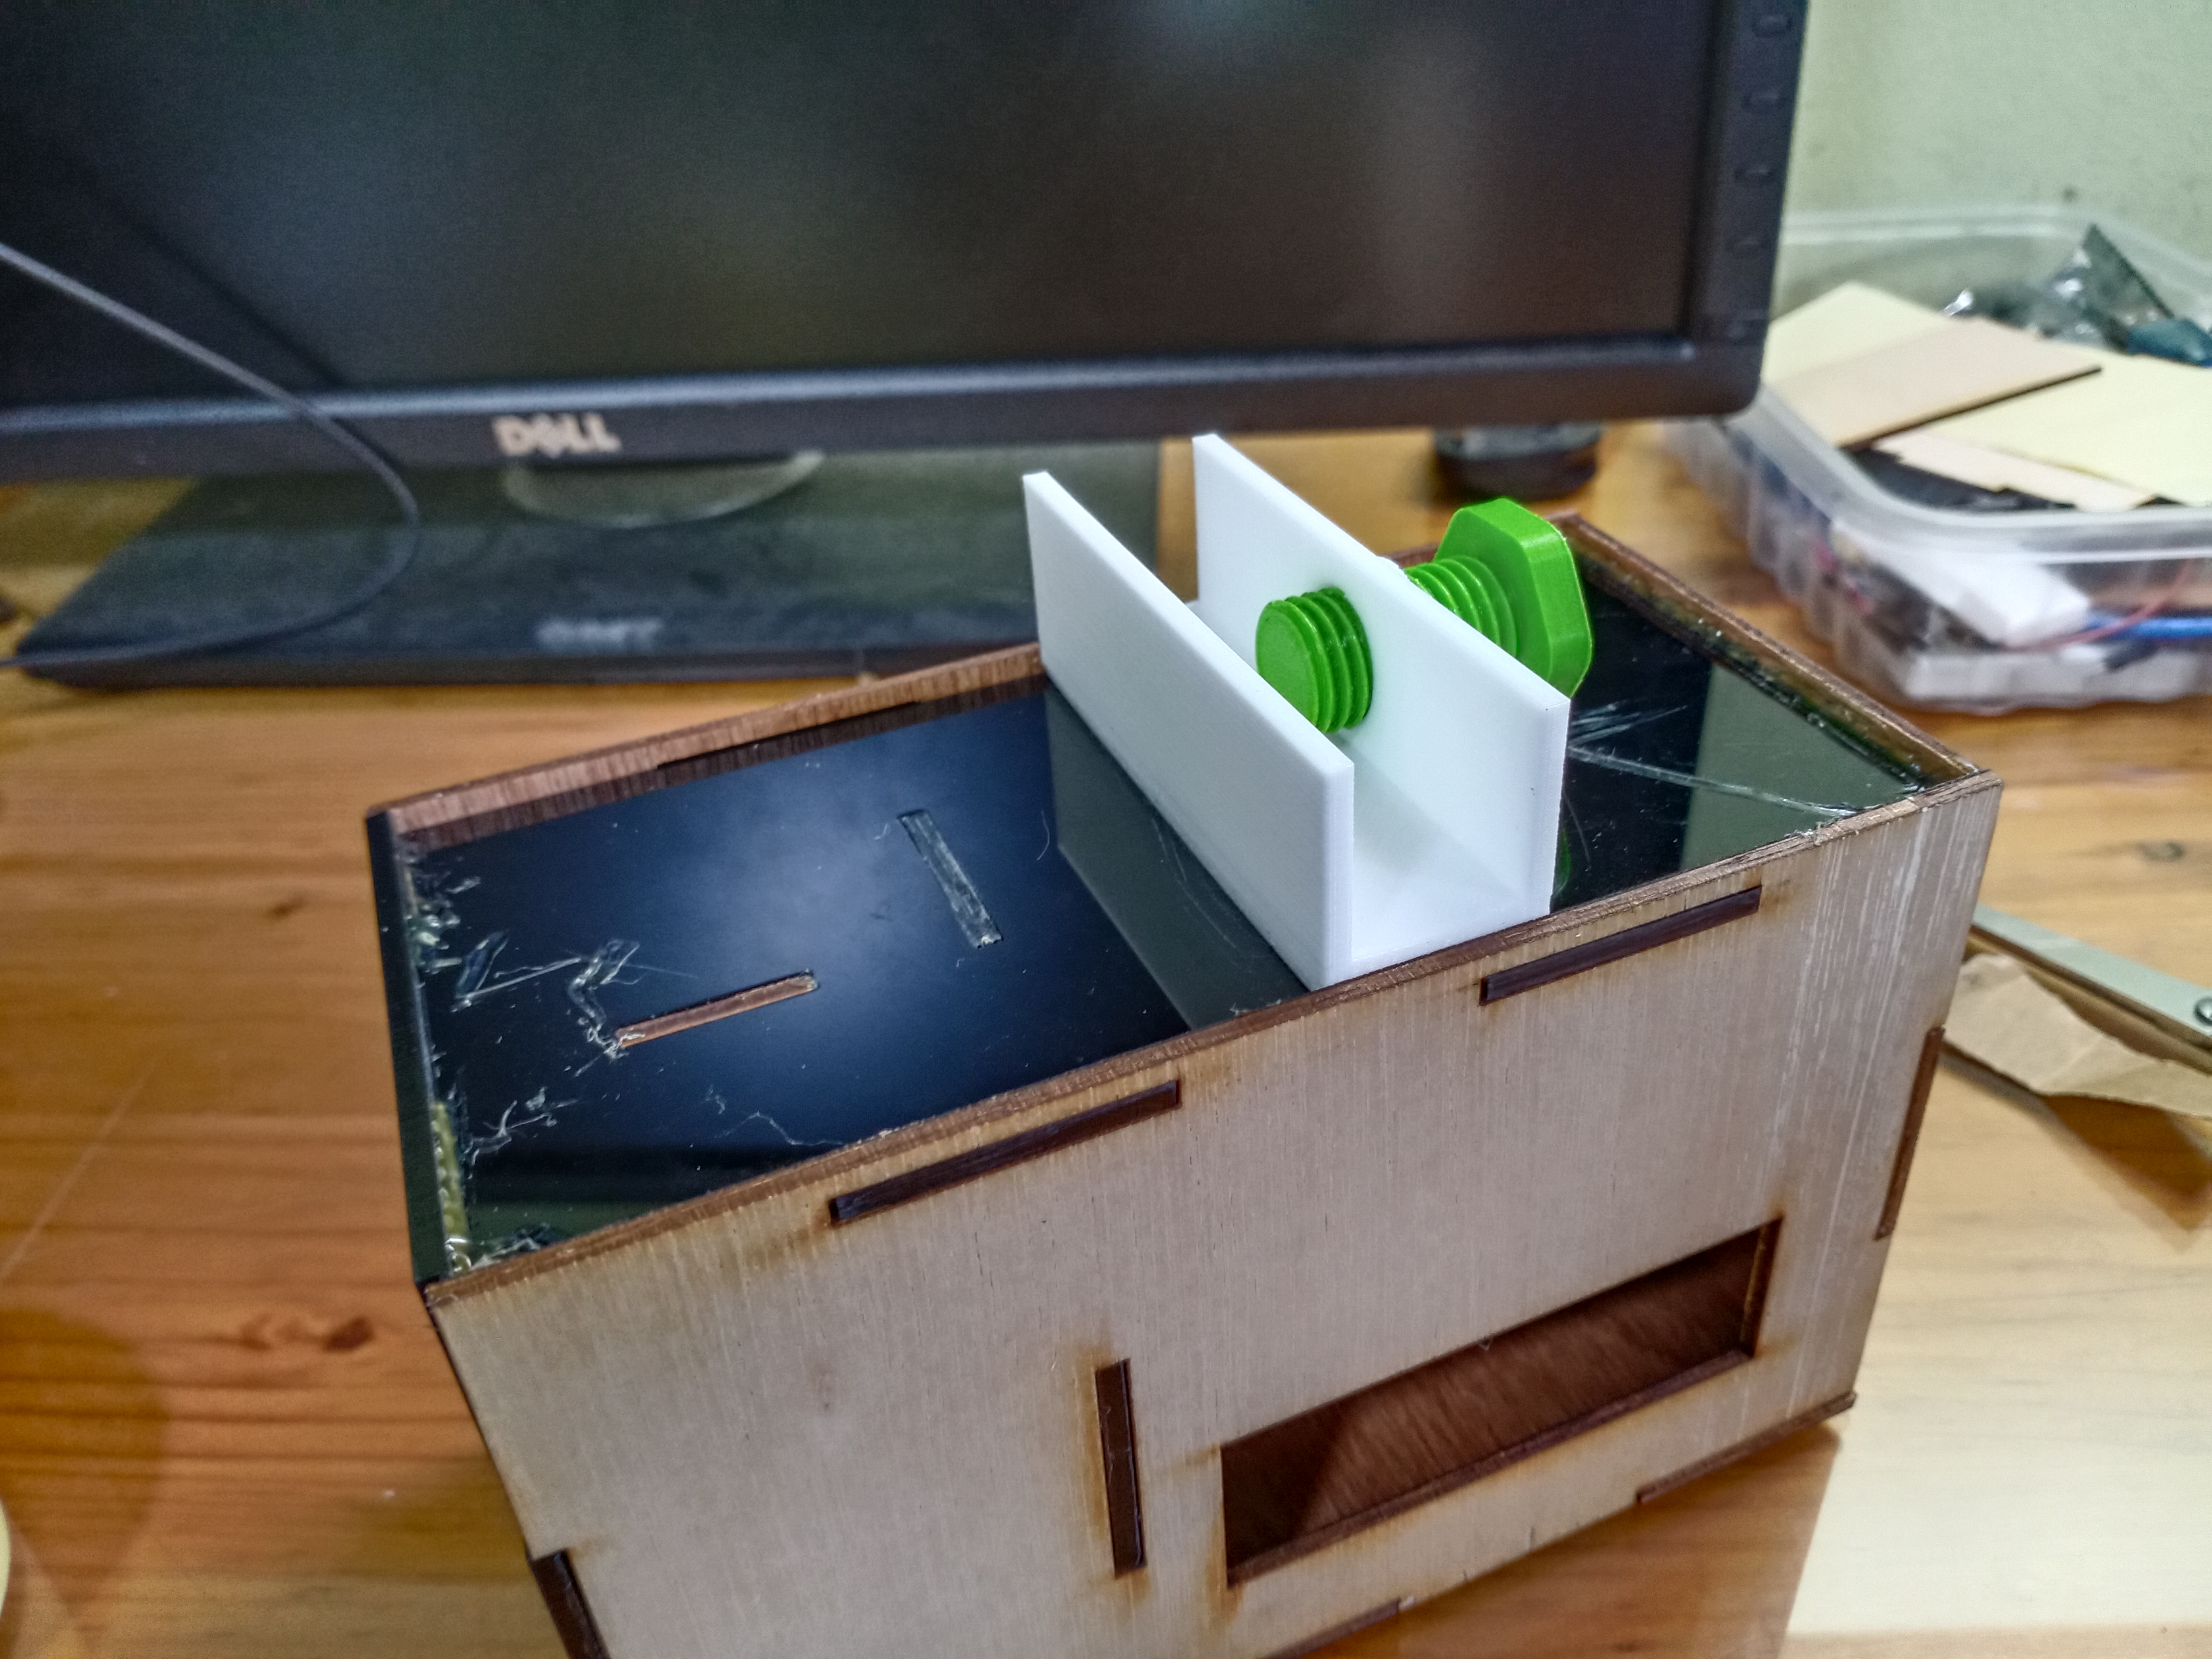
The case dimension is 160mm x 80mm x 100mm. I had to create an opening on the divider for the wire of servo motor. Next, I create the hopper. I will need to use loft to make the overall shape, then create a shell with thickness of 1mm. I will make an opening on the hopper. The hopper was quite easy to make.
I decided to put a hinge on the food cover to make it more accessible. Next, I need to make openings for the LCD display and servo motor. I took down the dimensions of the components then design. The opening for servo was abit difficult to create but I think I got it right.
I export the case and hatch door as dxf and compiled them into 1 dxf file using Inkscape. I also save the hopper as stl file and slice it for 3D printing using Cura. I realised that the hopper was too complex and long for 3D printing so I rescale/redesign the hopper to reduce time. I also had to make changes to the case as now the hopper will occupy a smaller area.
Here is the final hopper and case:
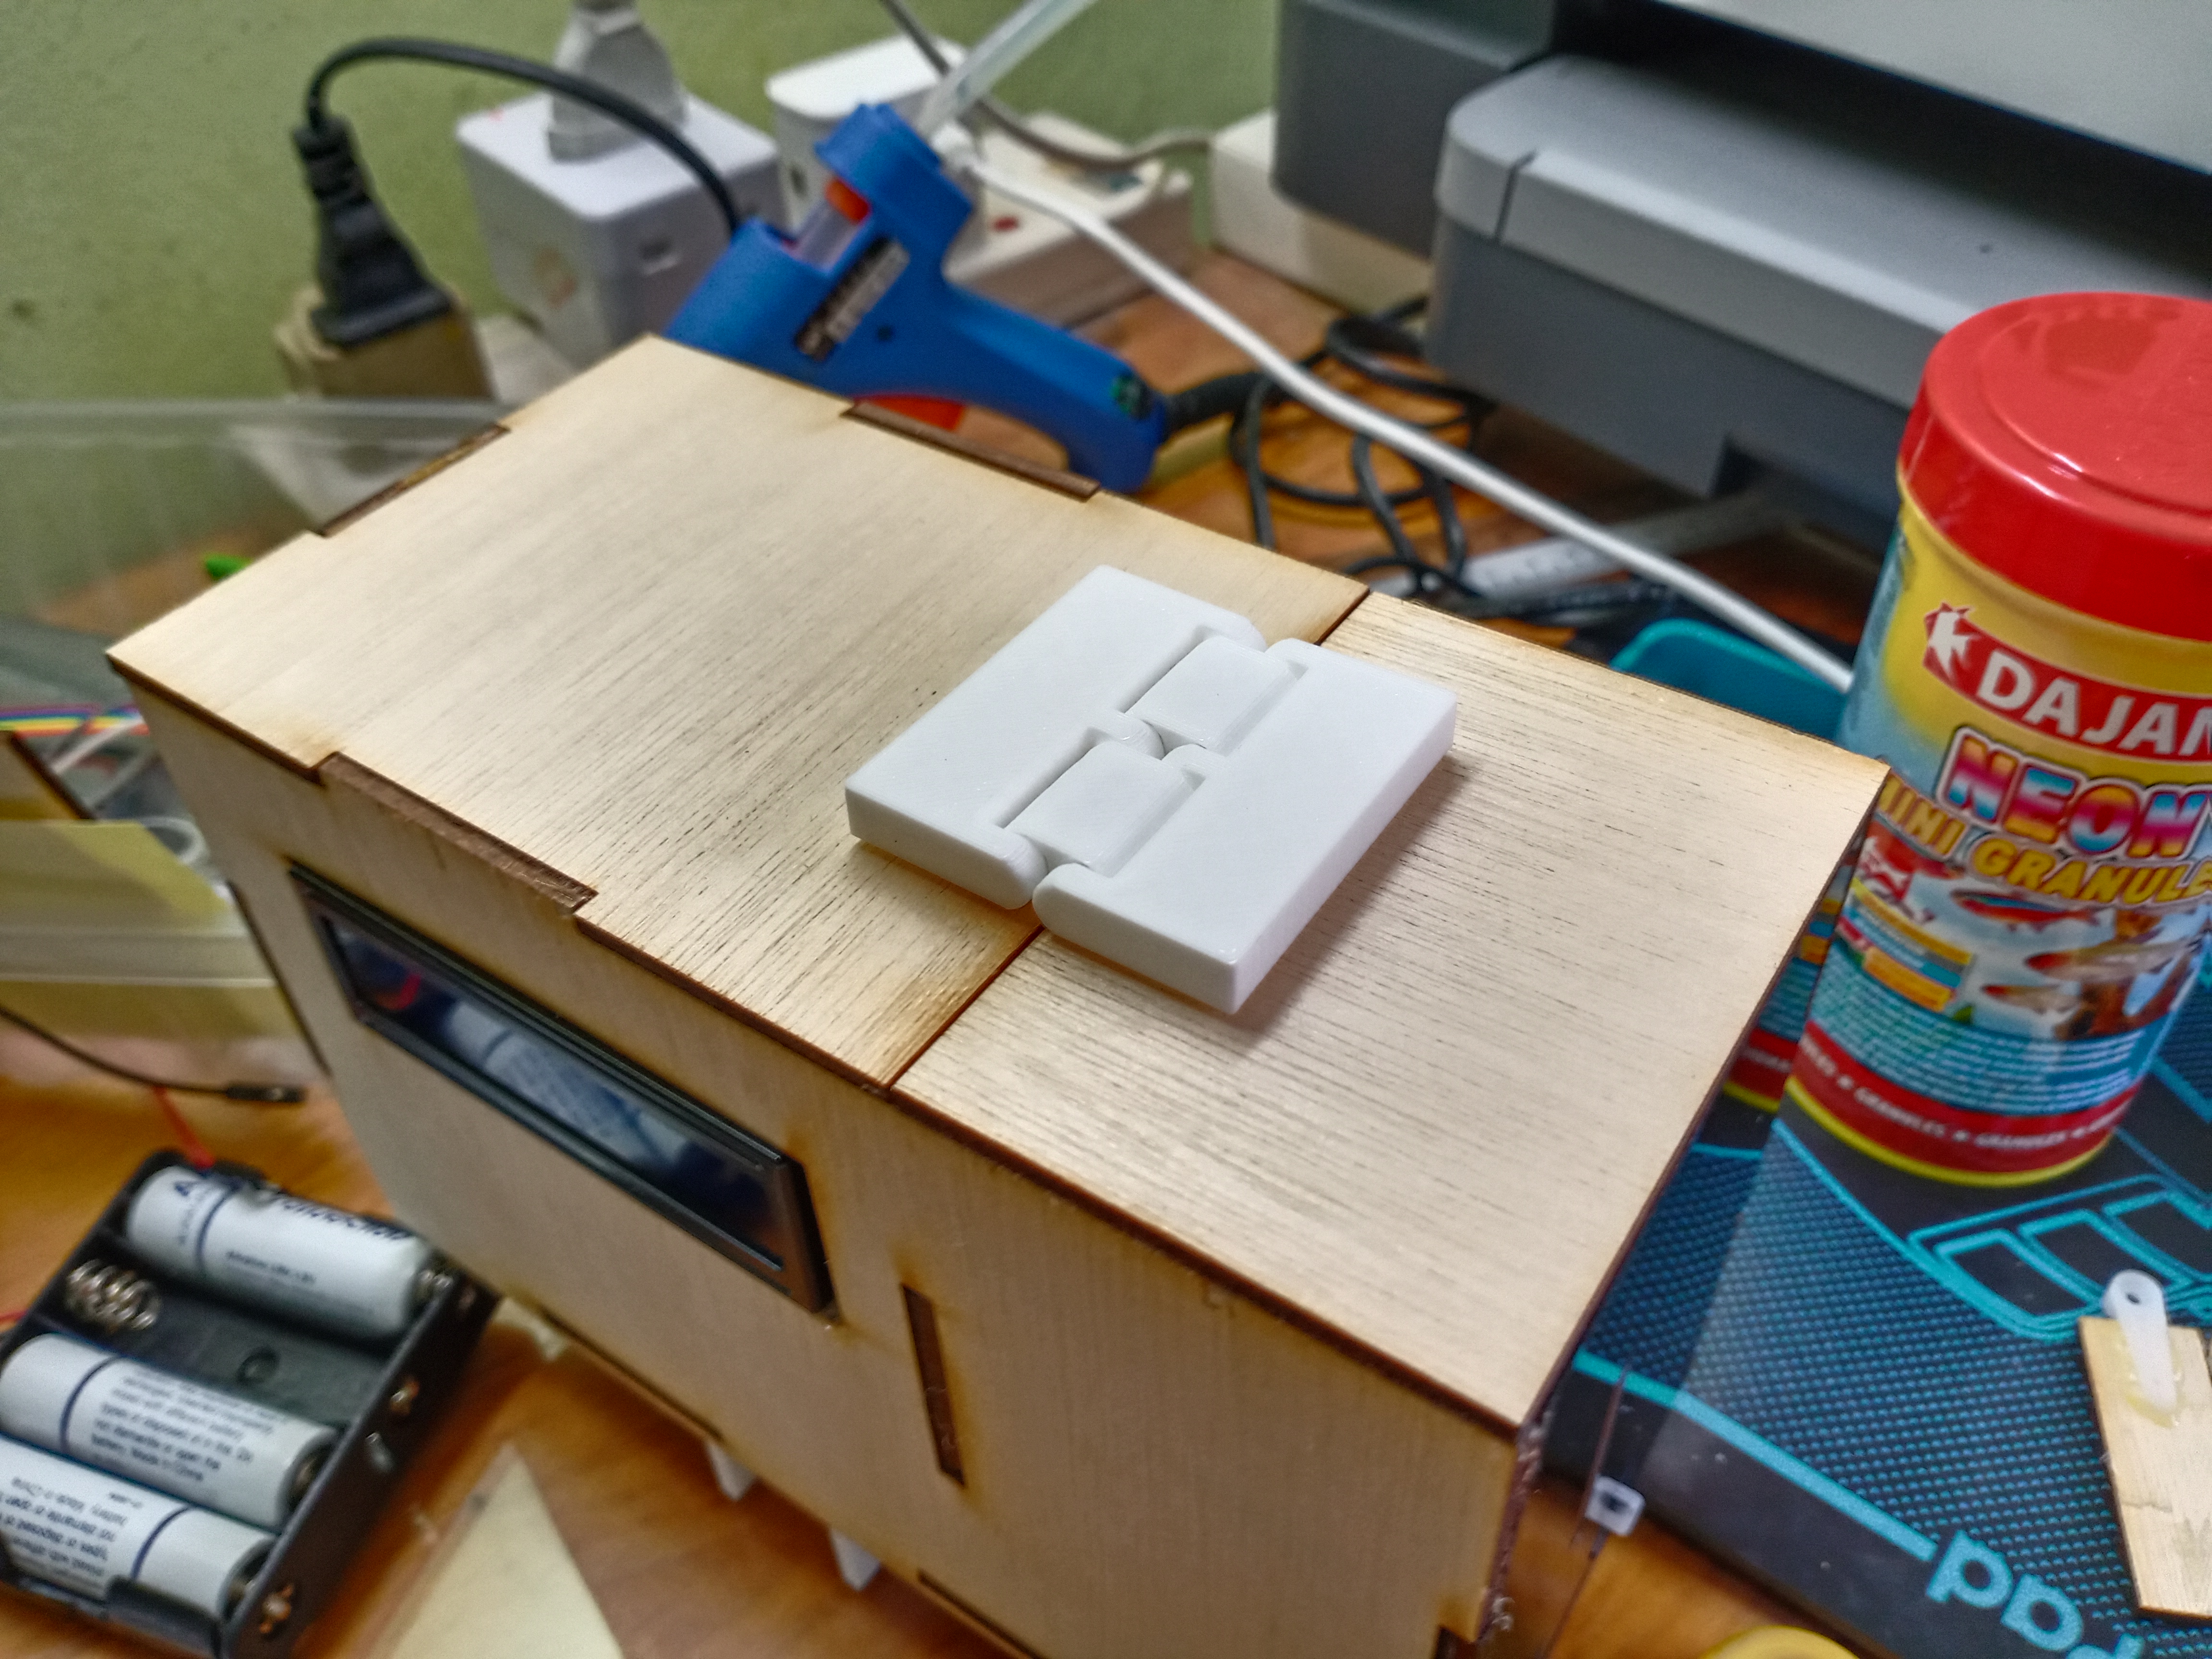
For the hinge, I found it on as it was quite difficult to create one. This guy’s hinge is pretty smooth and popular. Do check it out.
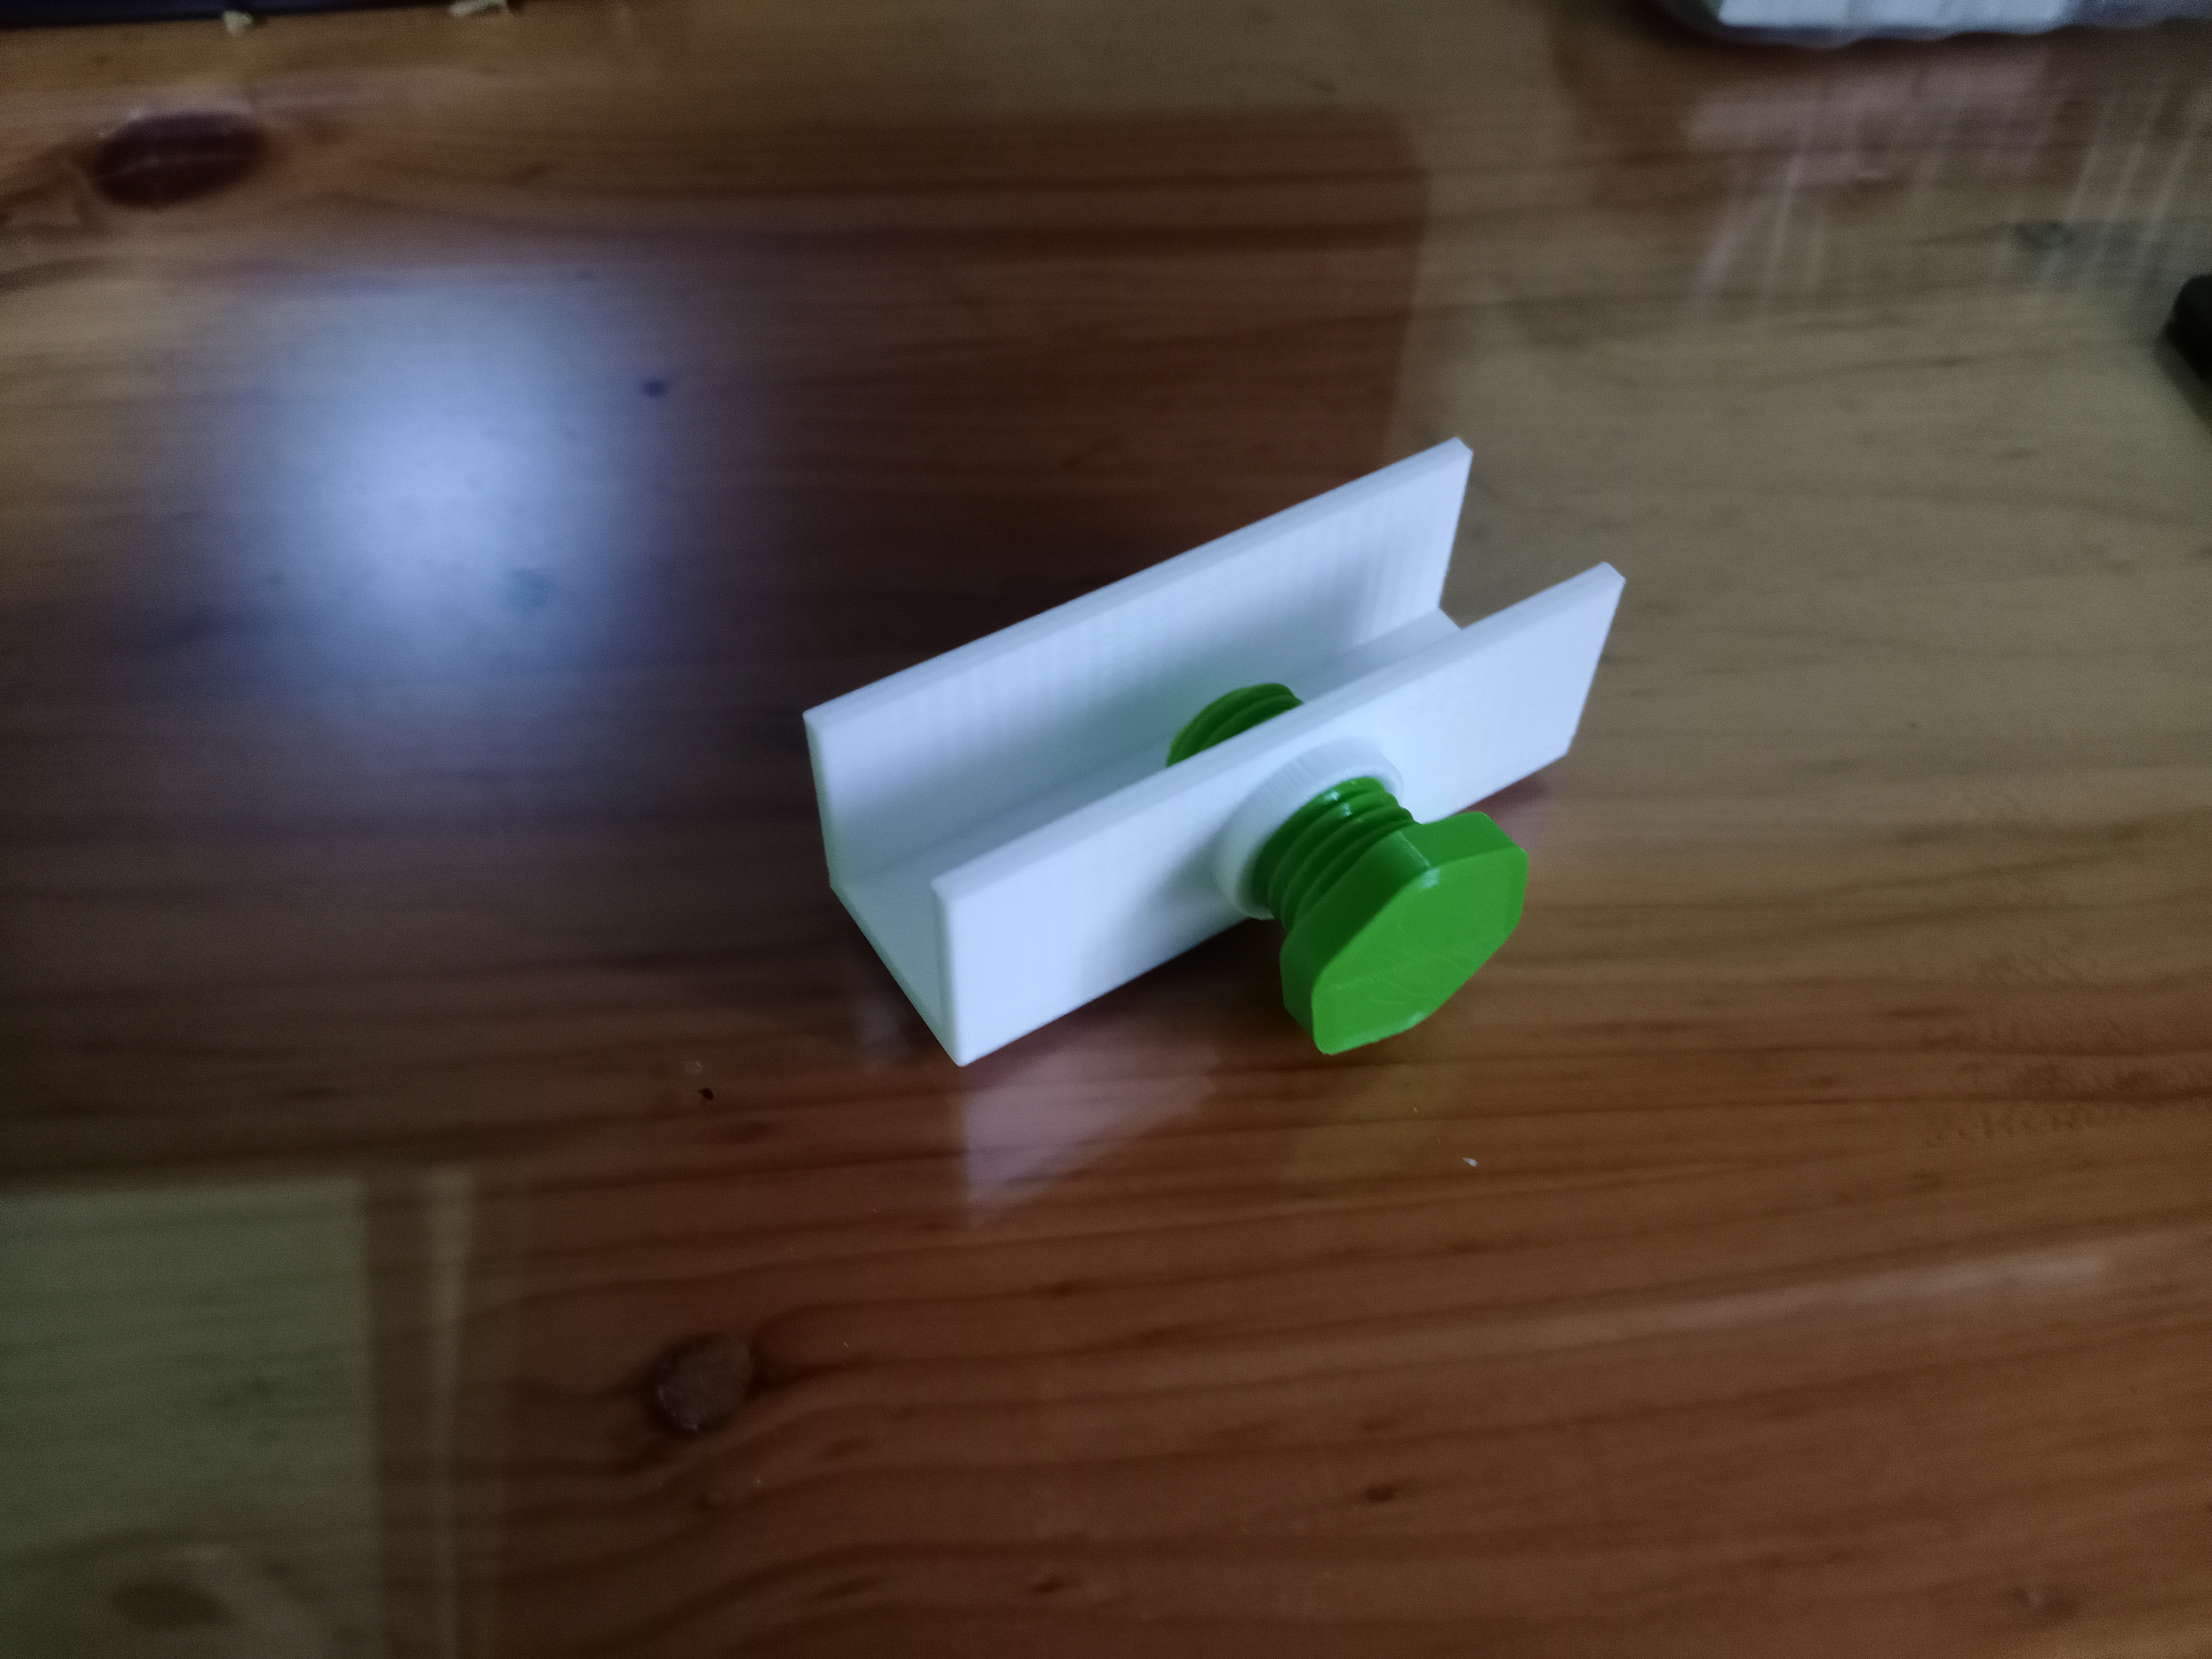
Next I need to create a mount for the case to sit on the fish tank. I made a clamp-like mount using screws to tighten. I got it ready for 3D printing. However, it did not turn out great. The threads I created are gone because of the supports. I realised that the screw and threads were too small so the 3D printer was not able to accurately print it, this means that I need rescale the mount and screw threads.
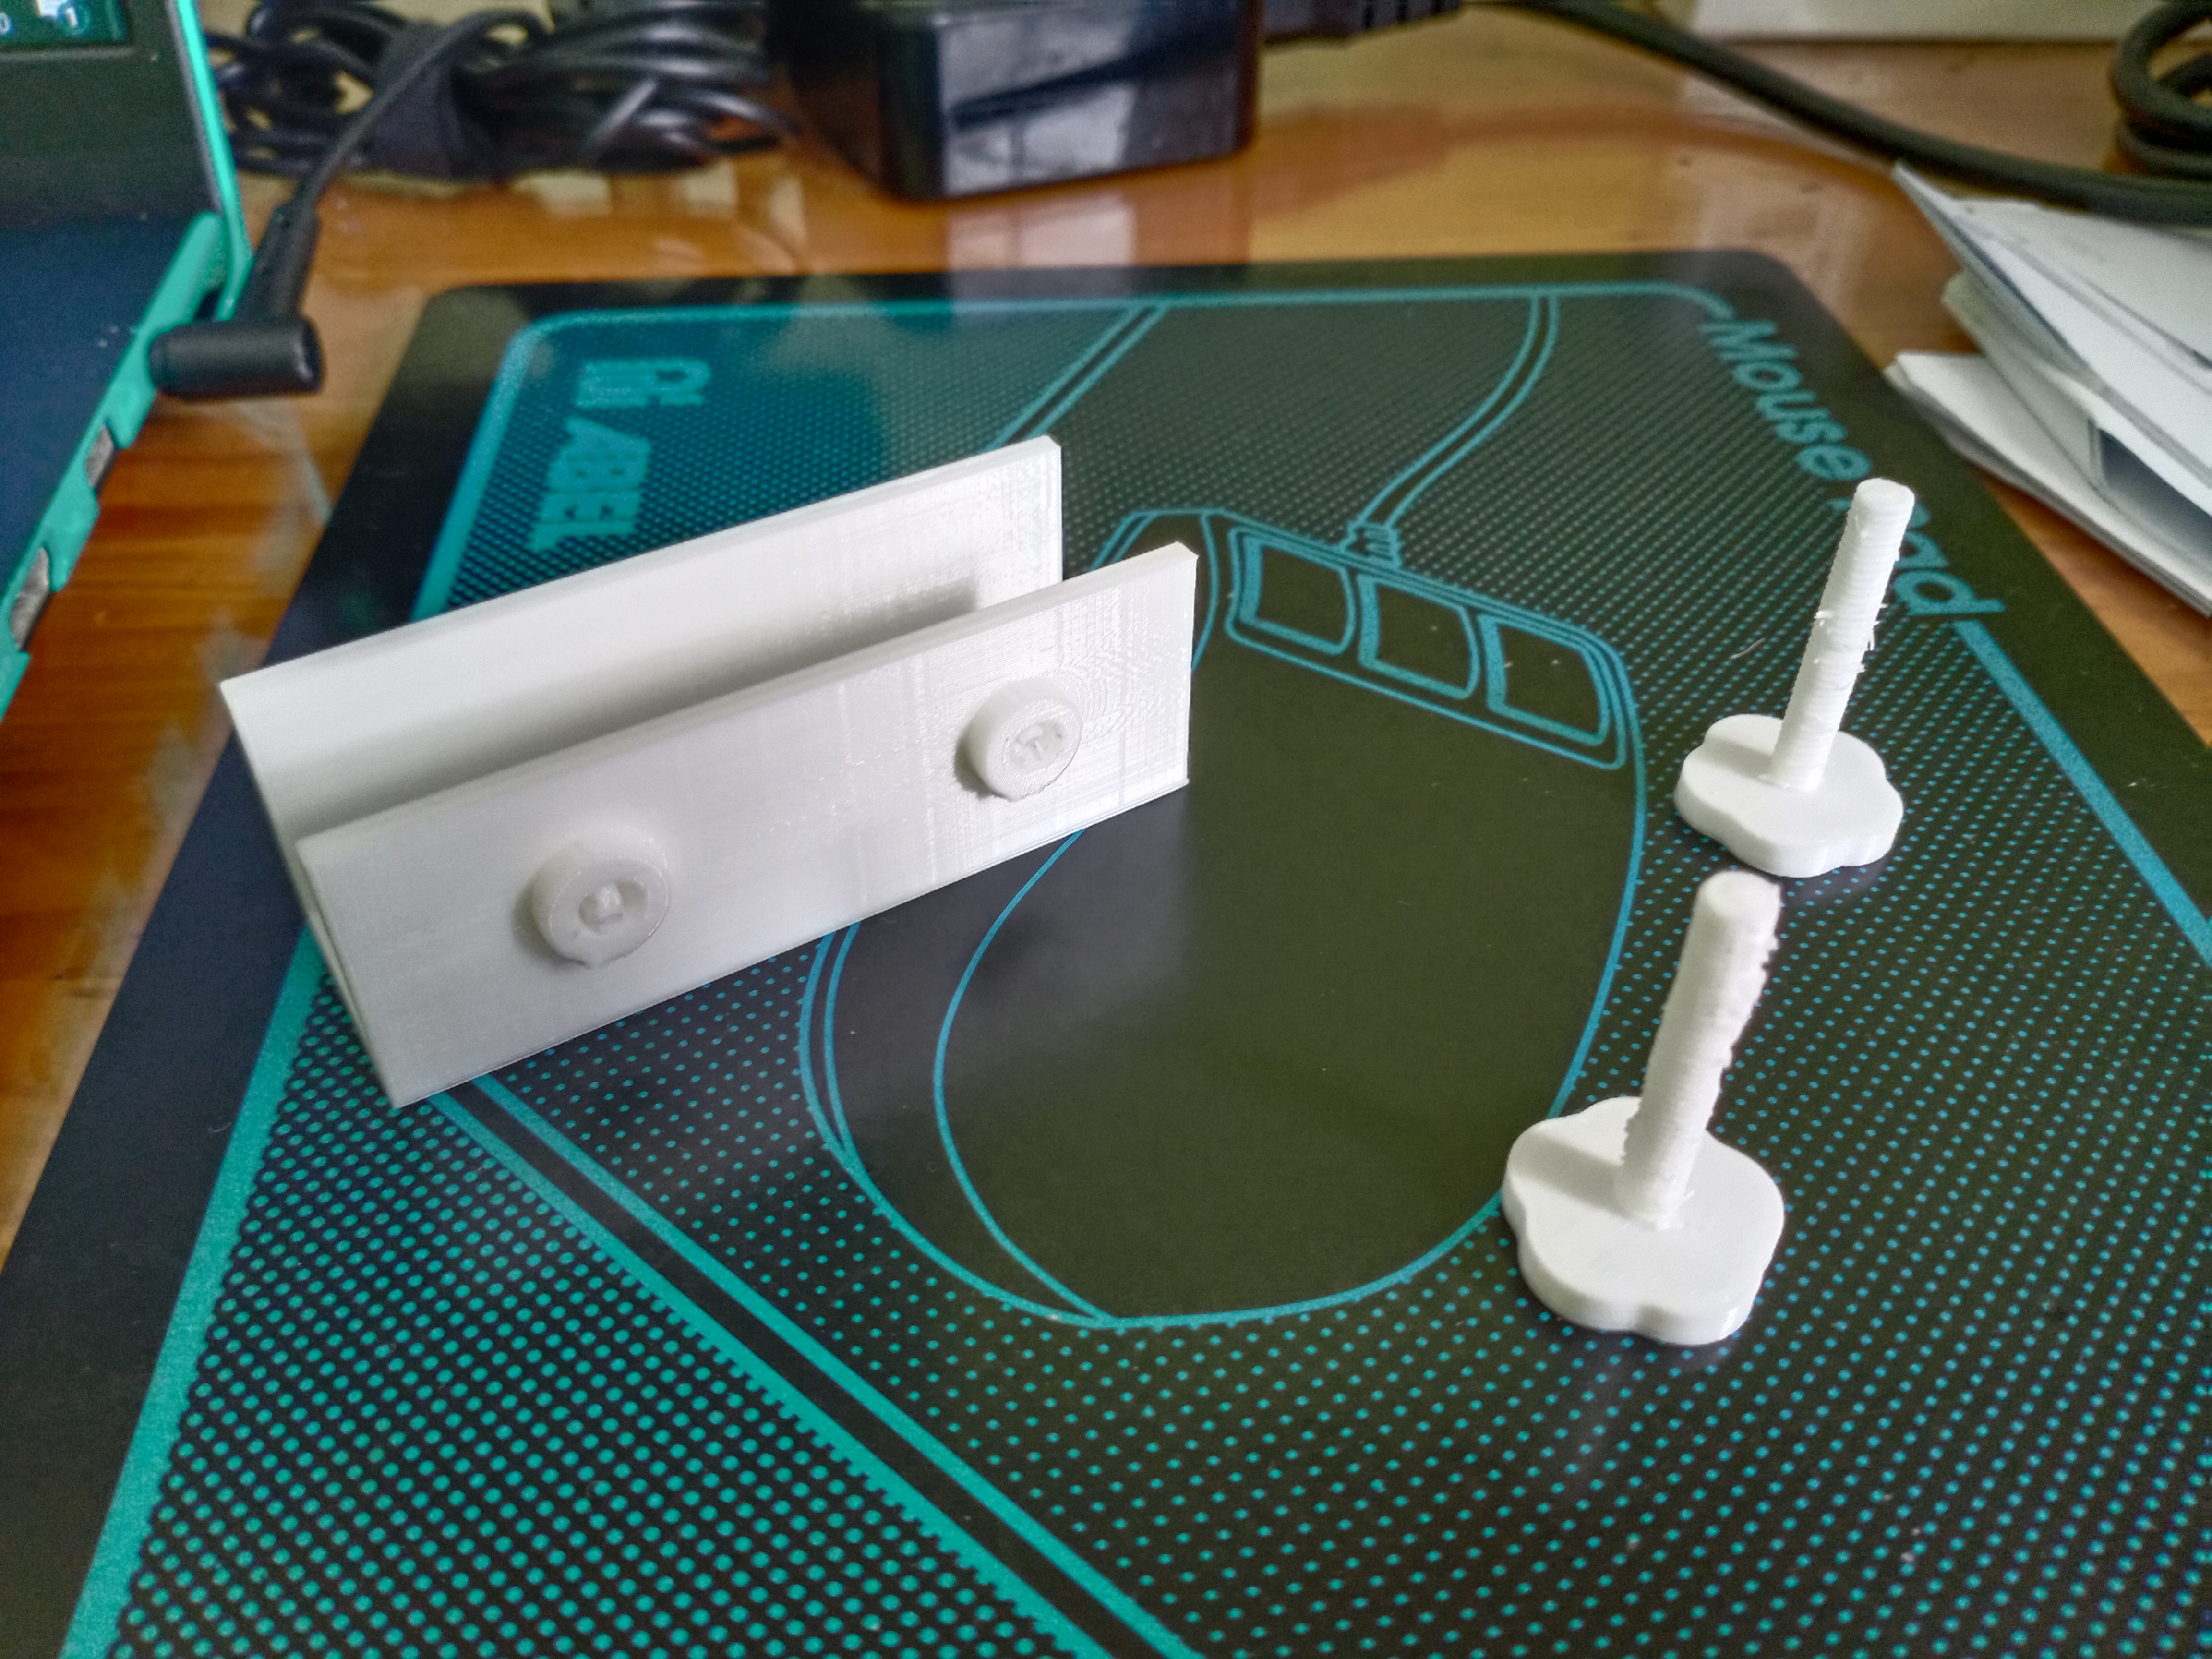
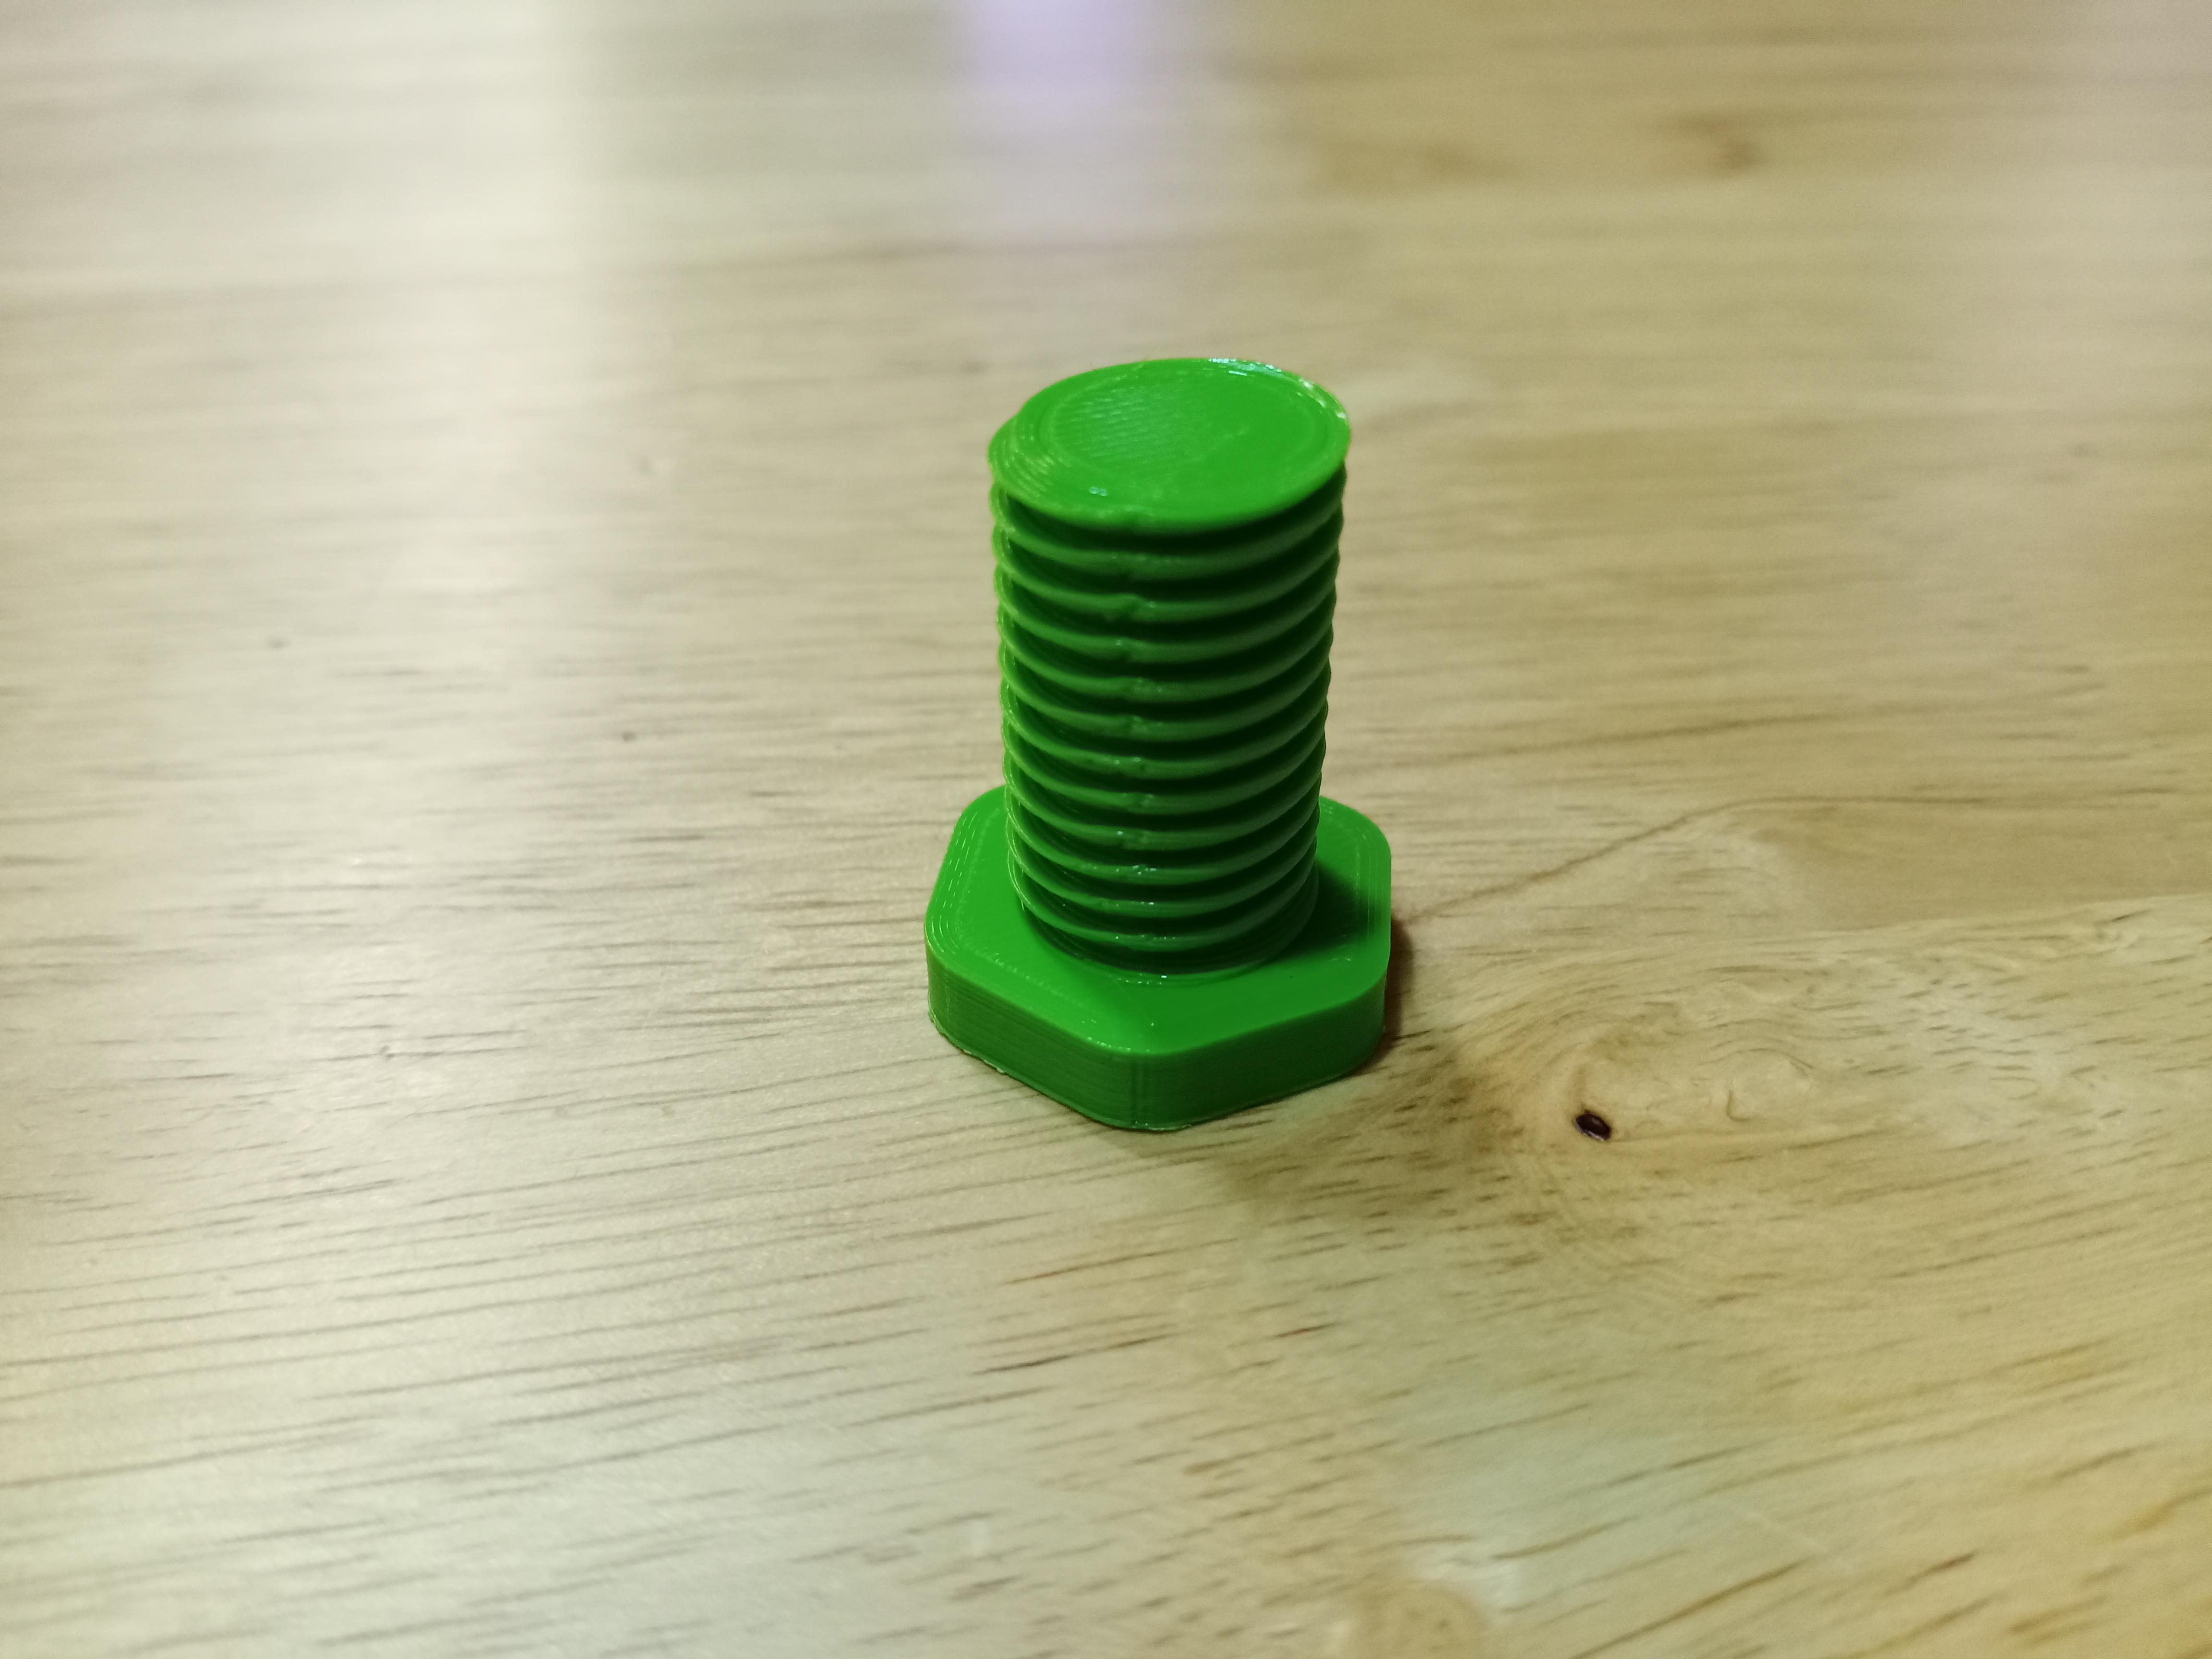
I decided to create 1 big screw as the threads will big enough to 3D print.
##Assembly
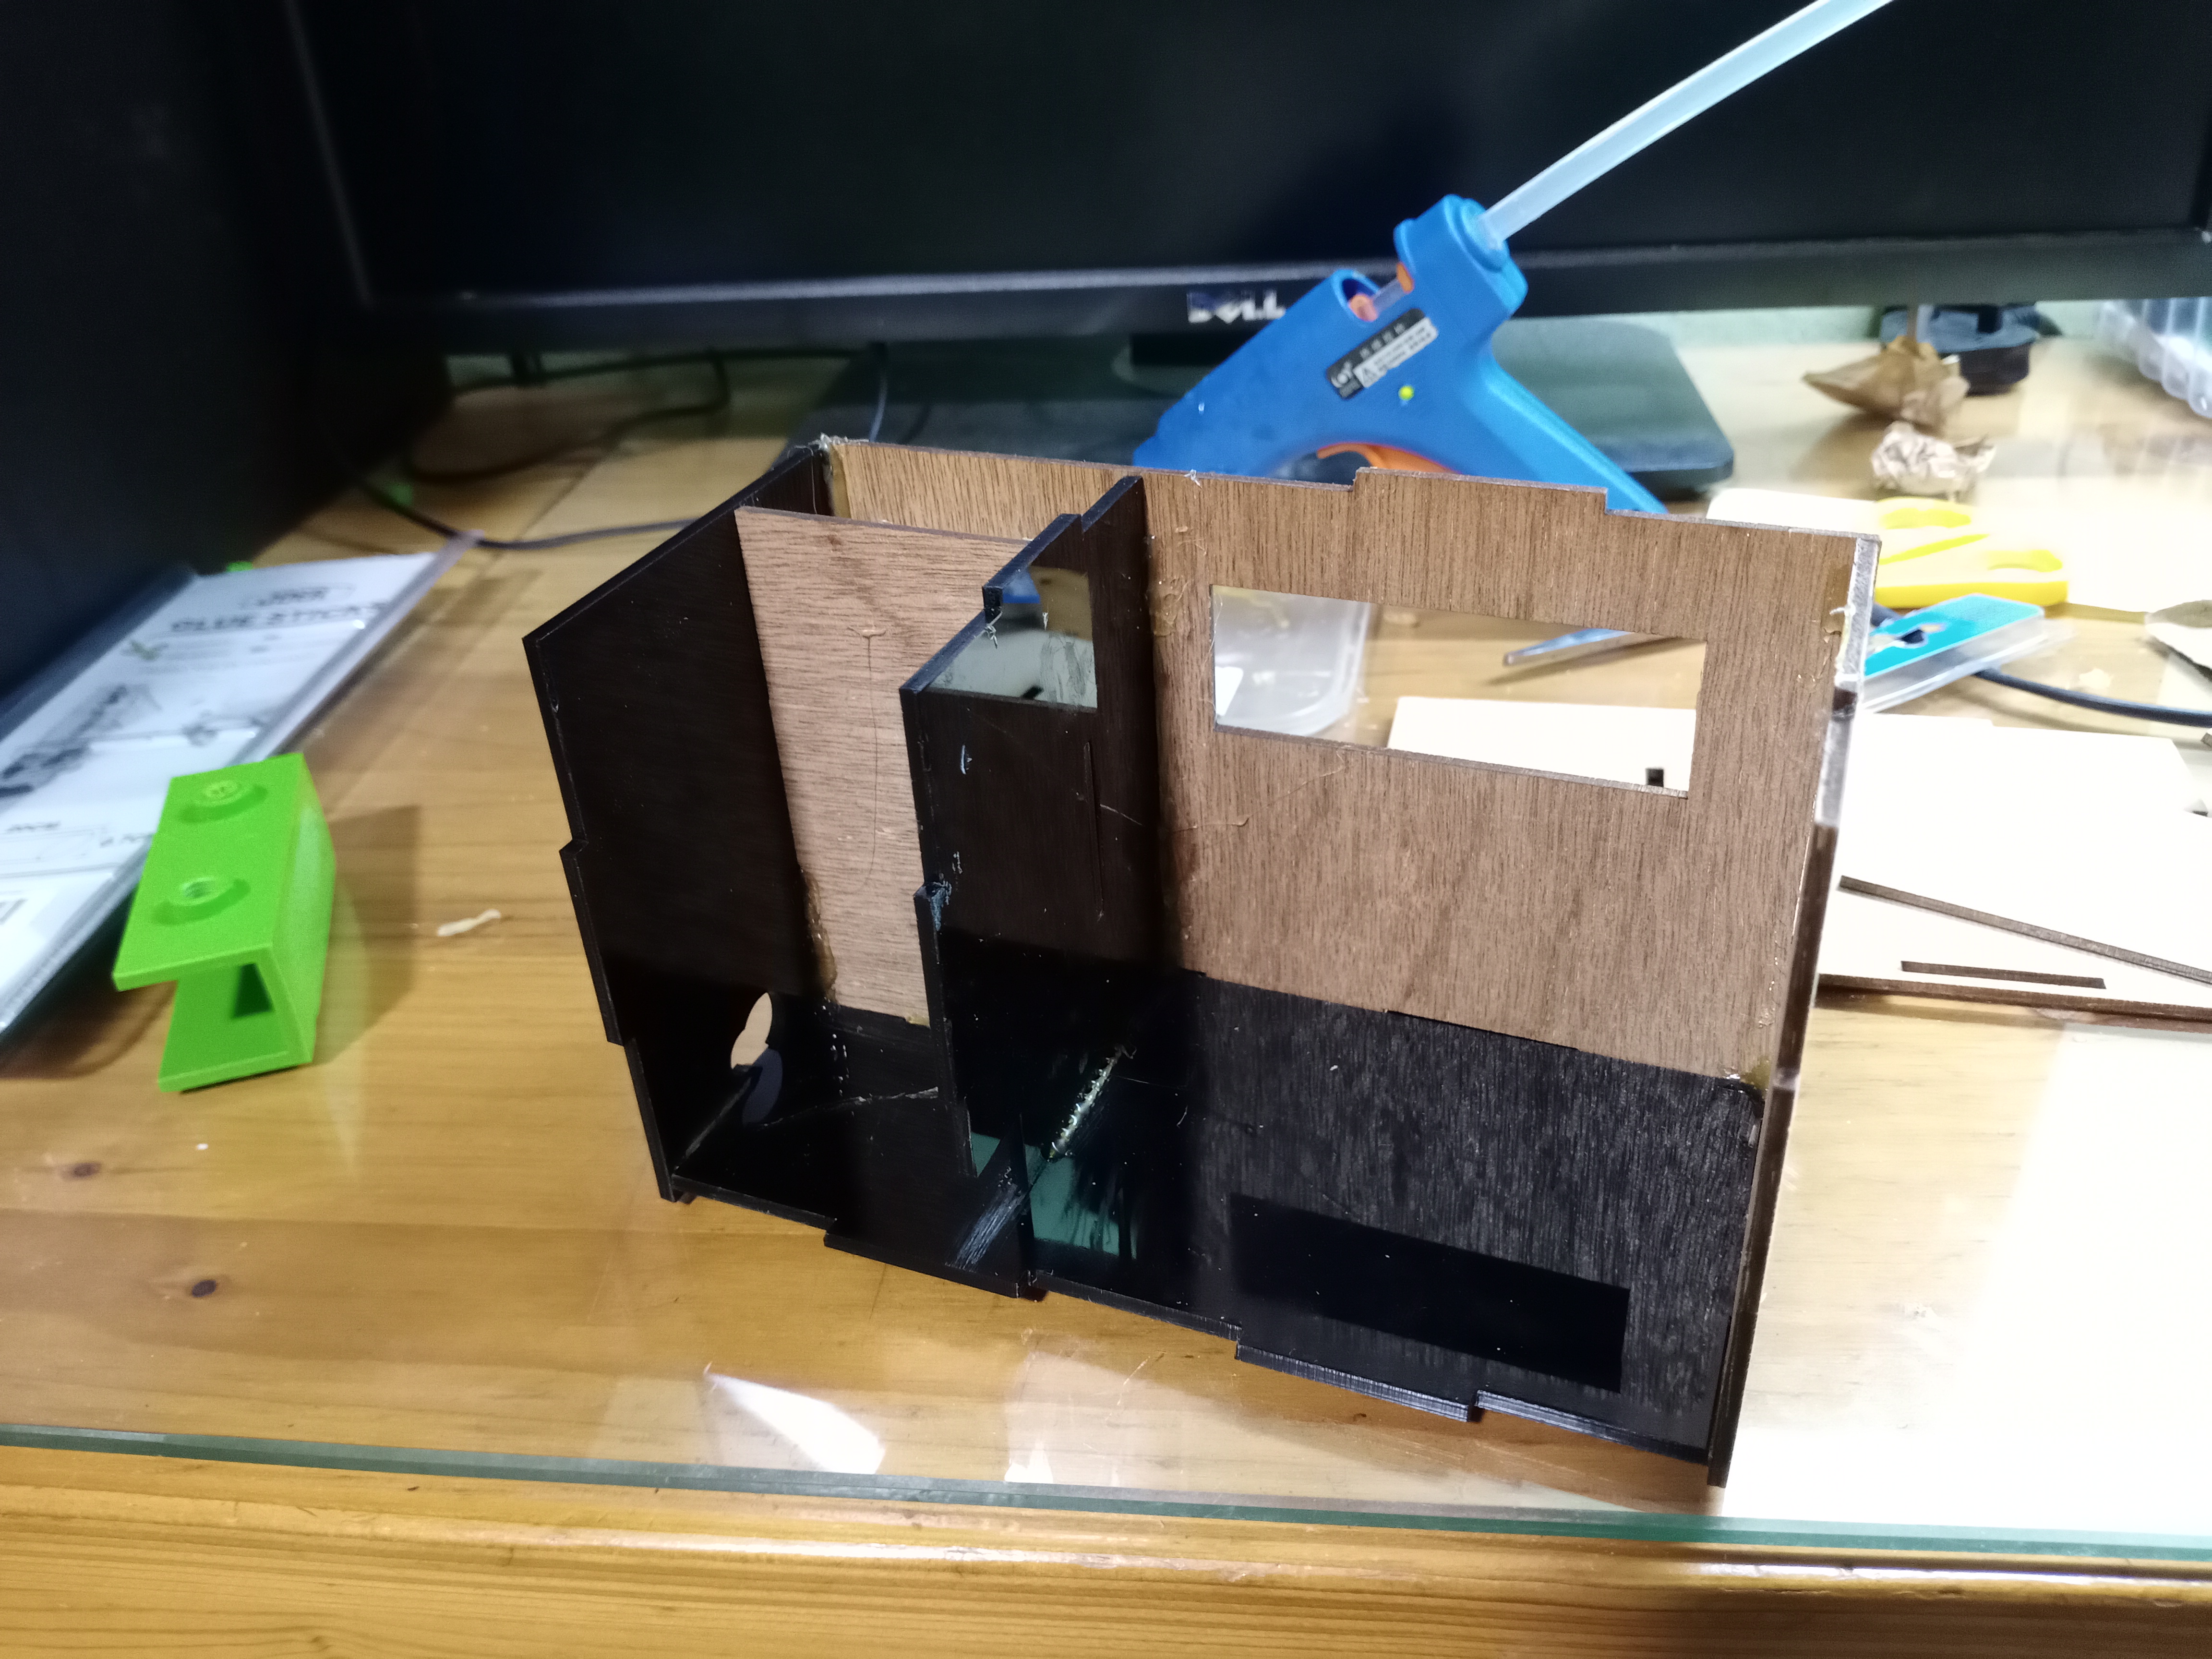
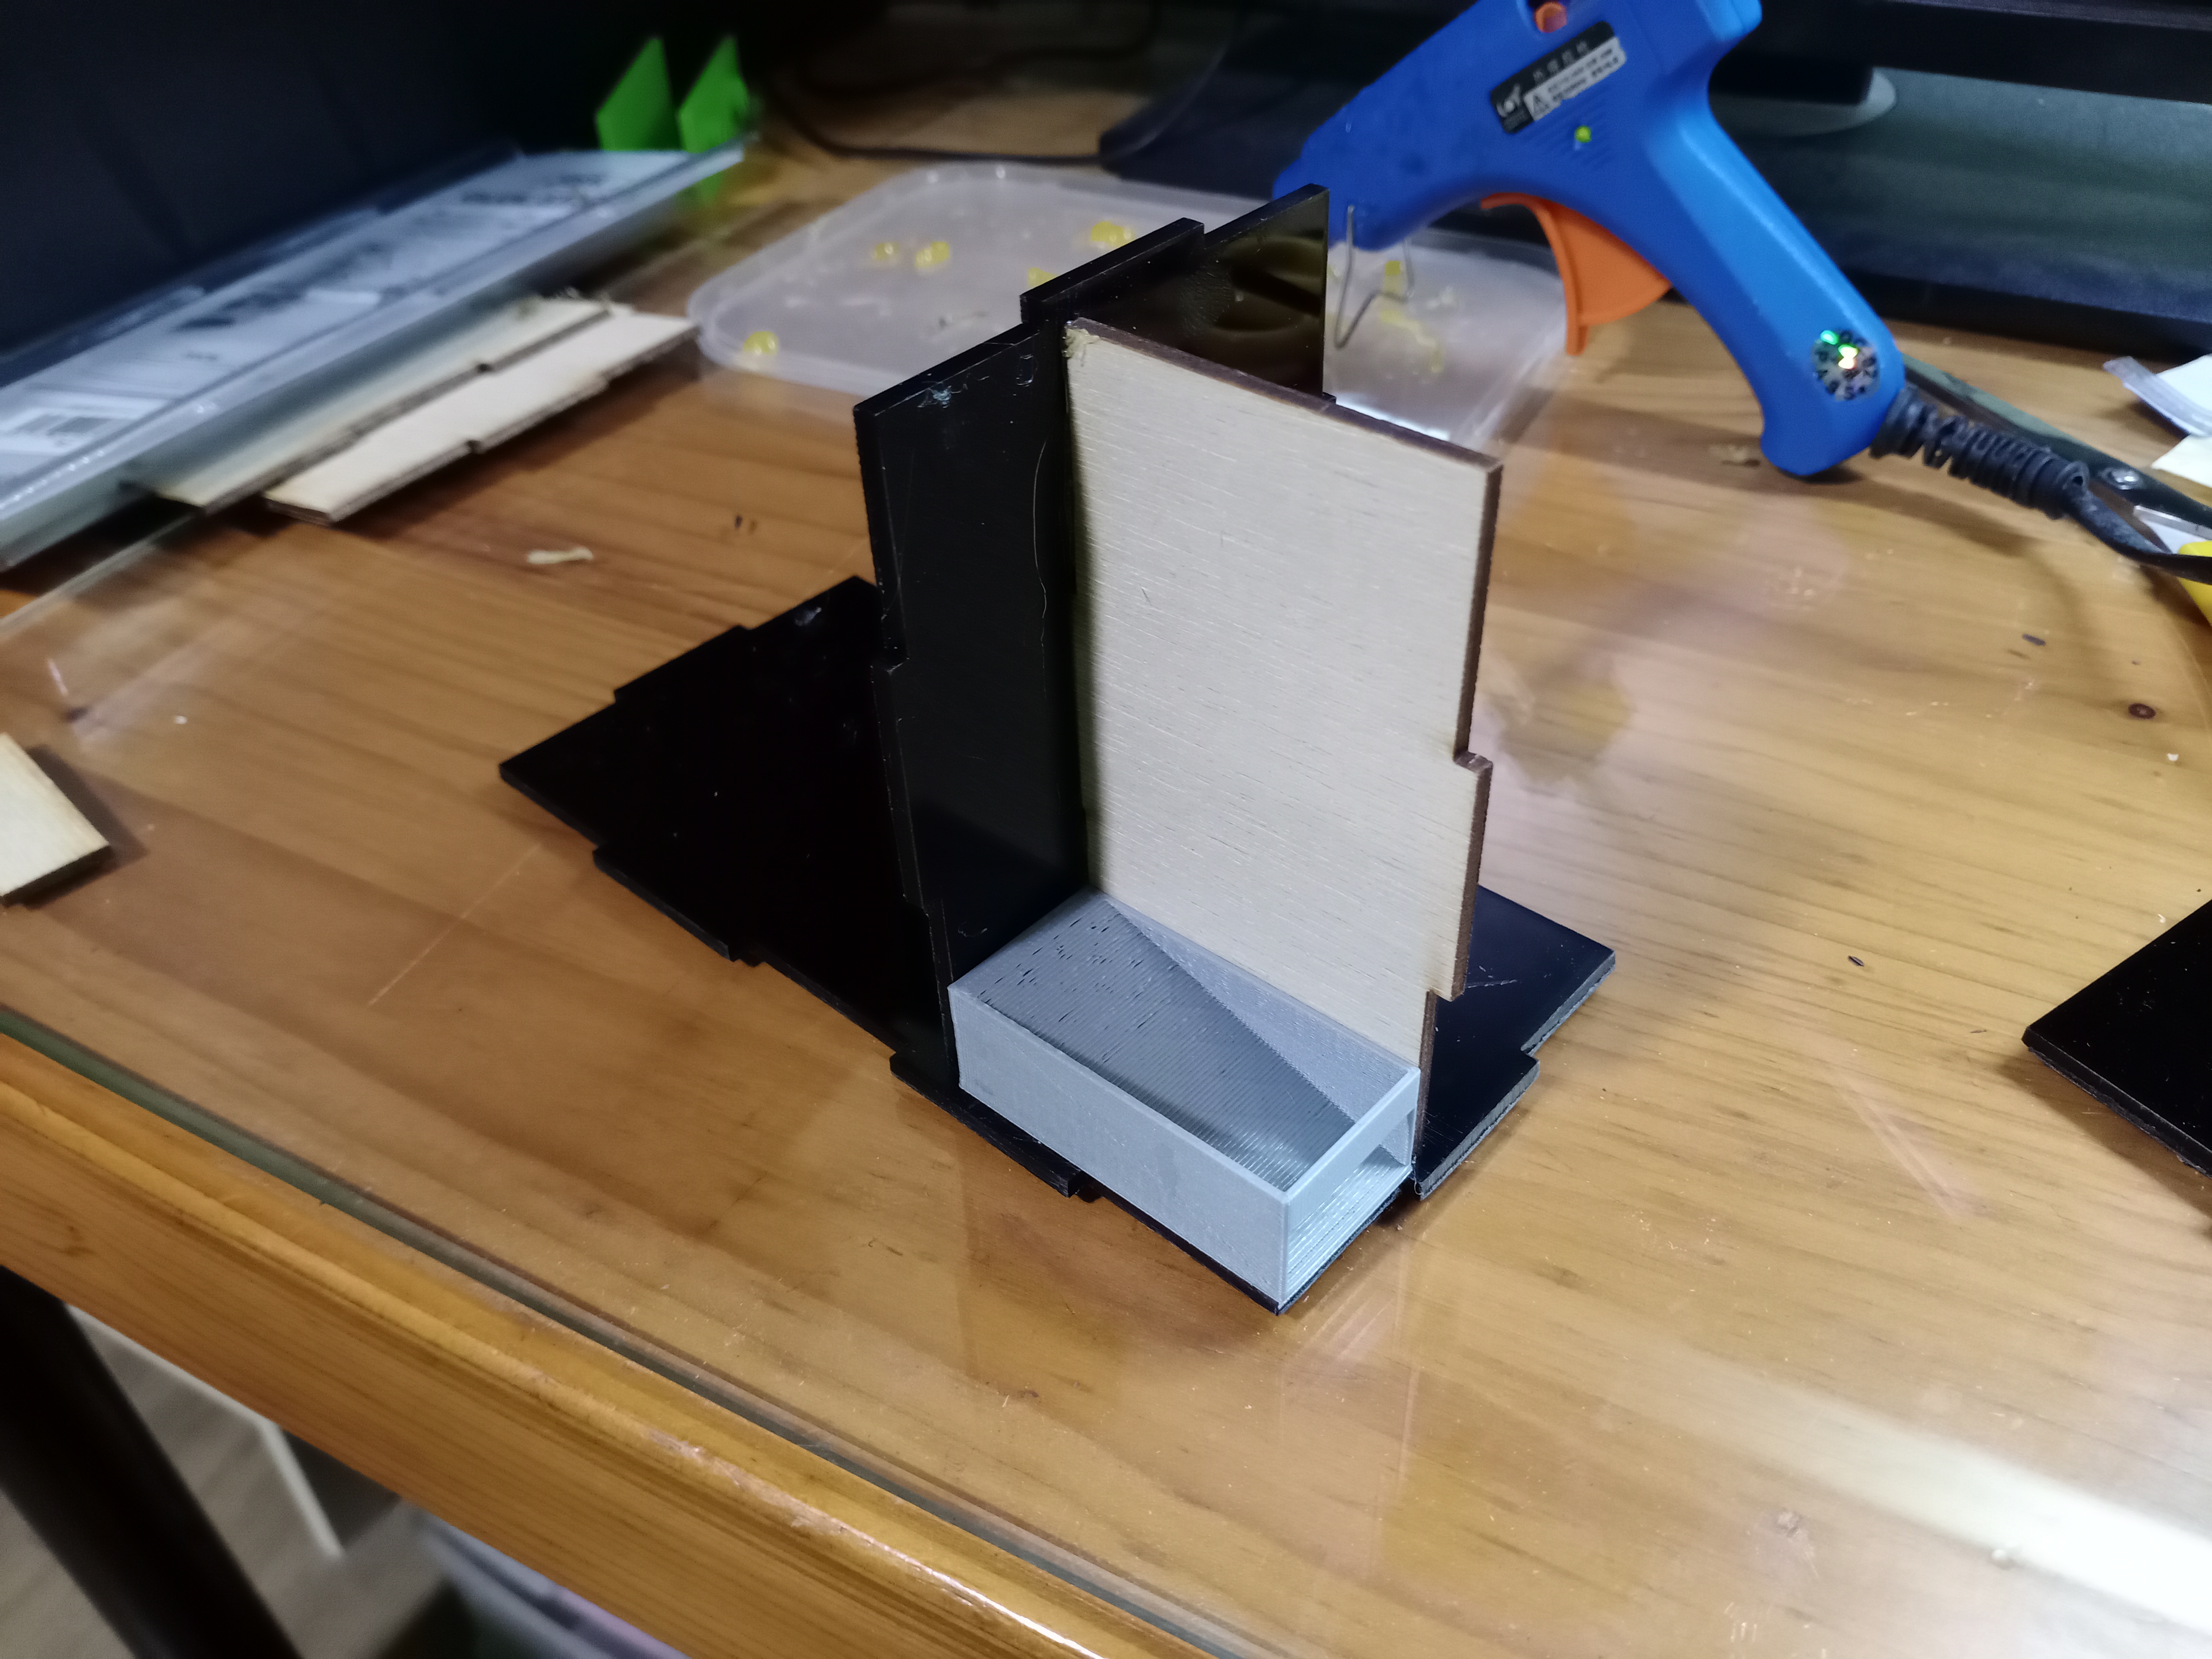
I first had to build the case, I used hot glue to stick them together. I did not glue one of the side to the case because I want to still be able to access the electronics. Then I stick the hopper using super glue and use mounting tape to stick the mount. I hot glued the sliding door to the servo hand. I used double sided tape to stick the servo and velcro straps for the arduino and battery holder so that I can still access them. Here are some photos of assembly:
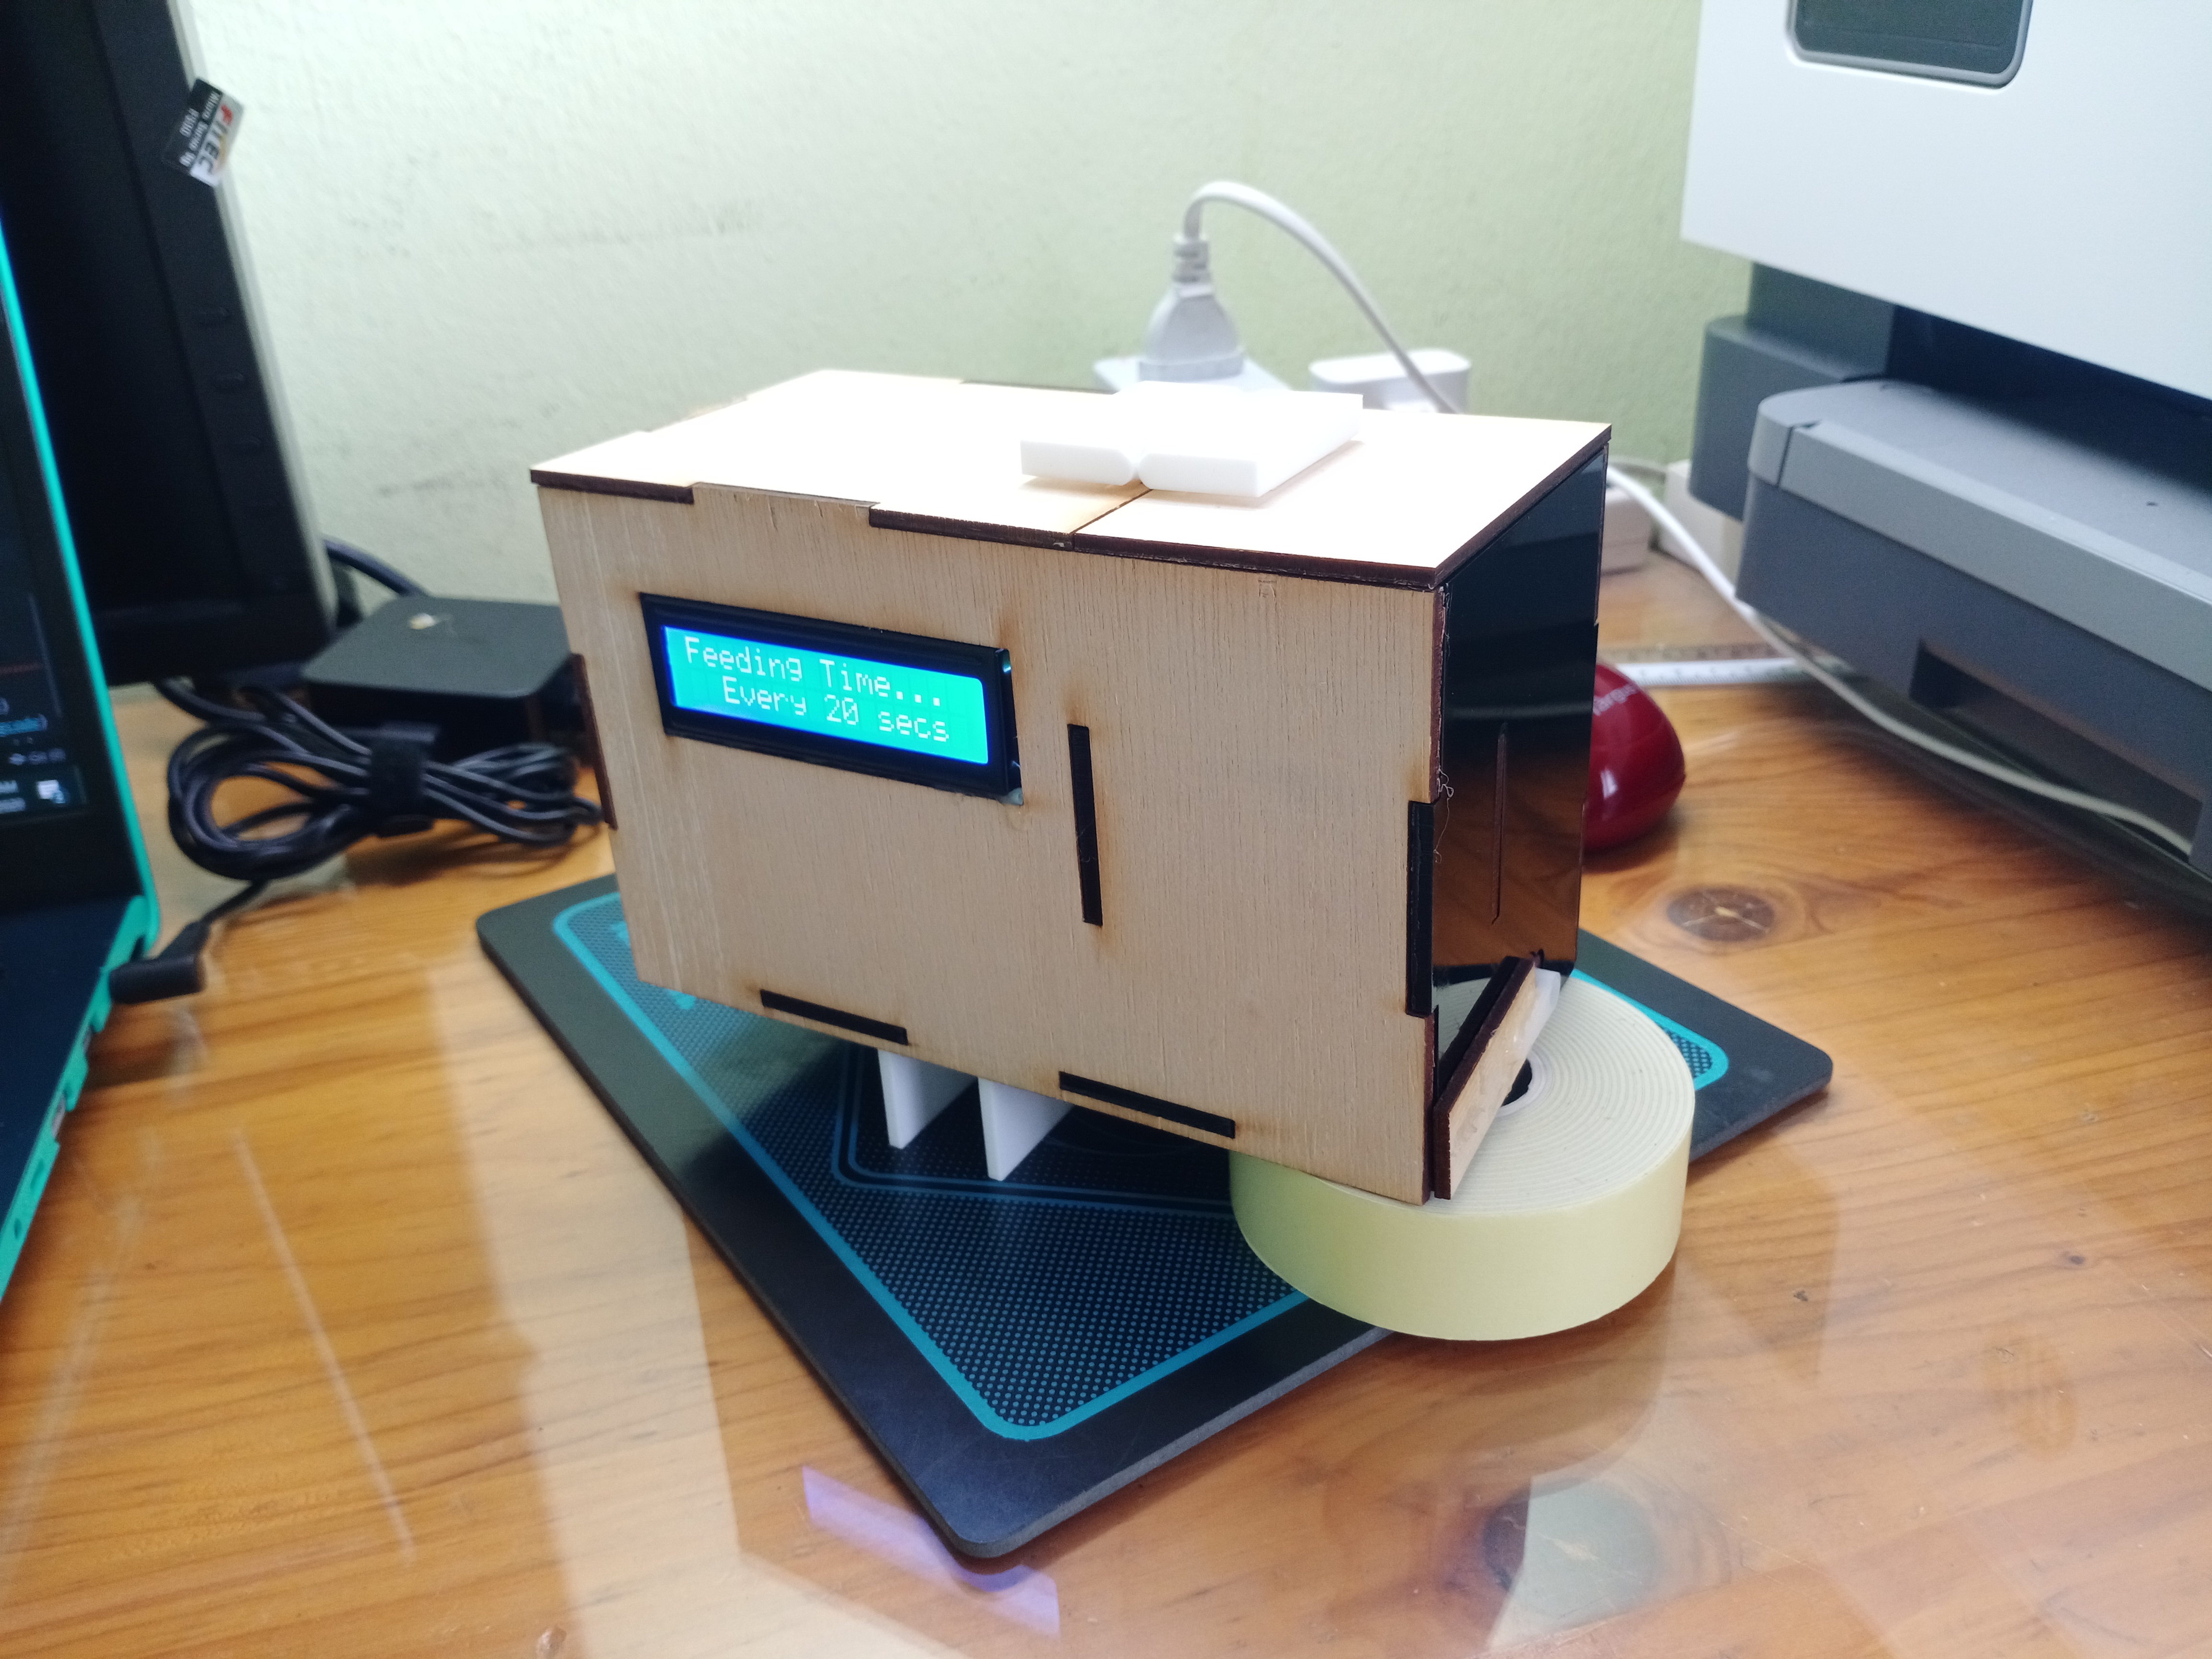
Final Product
I’m happy with the final result, it looks good.
Here are the files
Bill-of-Materials
